<spring으로 구현>
소셜 로그인 구현
게시판 구현 - 데이터베이스 구성
외부라이브러리 연동
javascript
※콜백함수 반드시 알기※ 실력발휘하게되는것중 하나
어제 이어서
(PT)Javascript와_Node.js_09강_함수-심화
<!DOCTYPE html>
<html>
<head>
<meta charset="EUC-KR">
<title>Insert title here</title>
<script type="text/javascript"></script>
<style>
</style>
</head>
<body>
<script type="text/javascript">
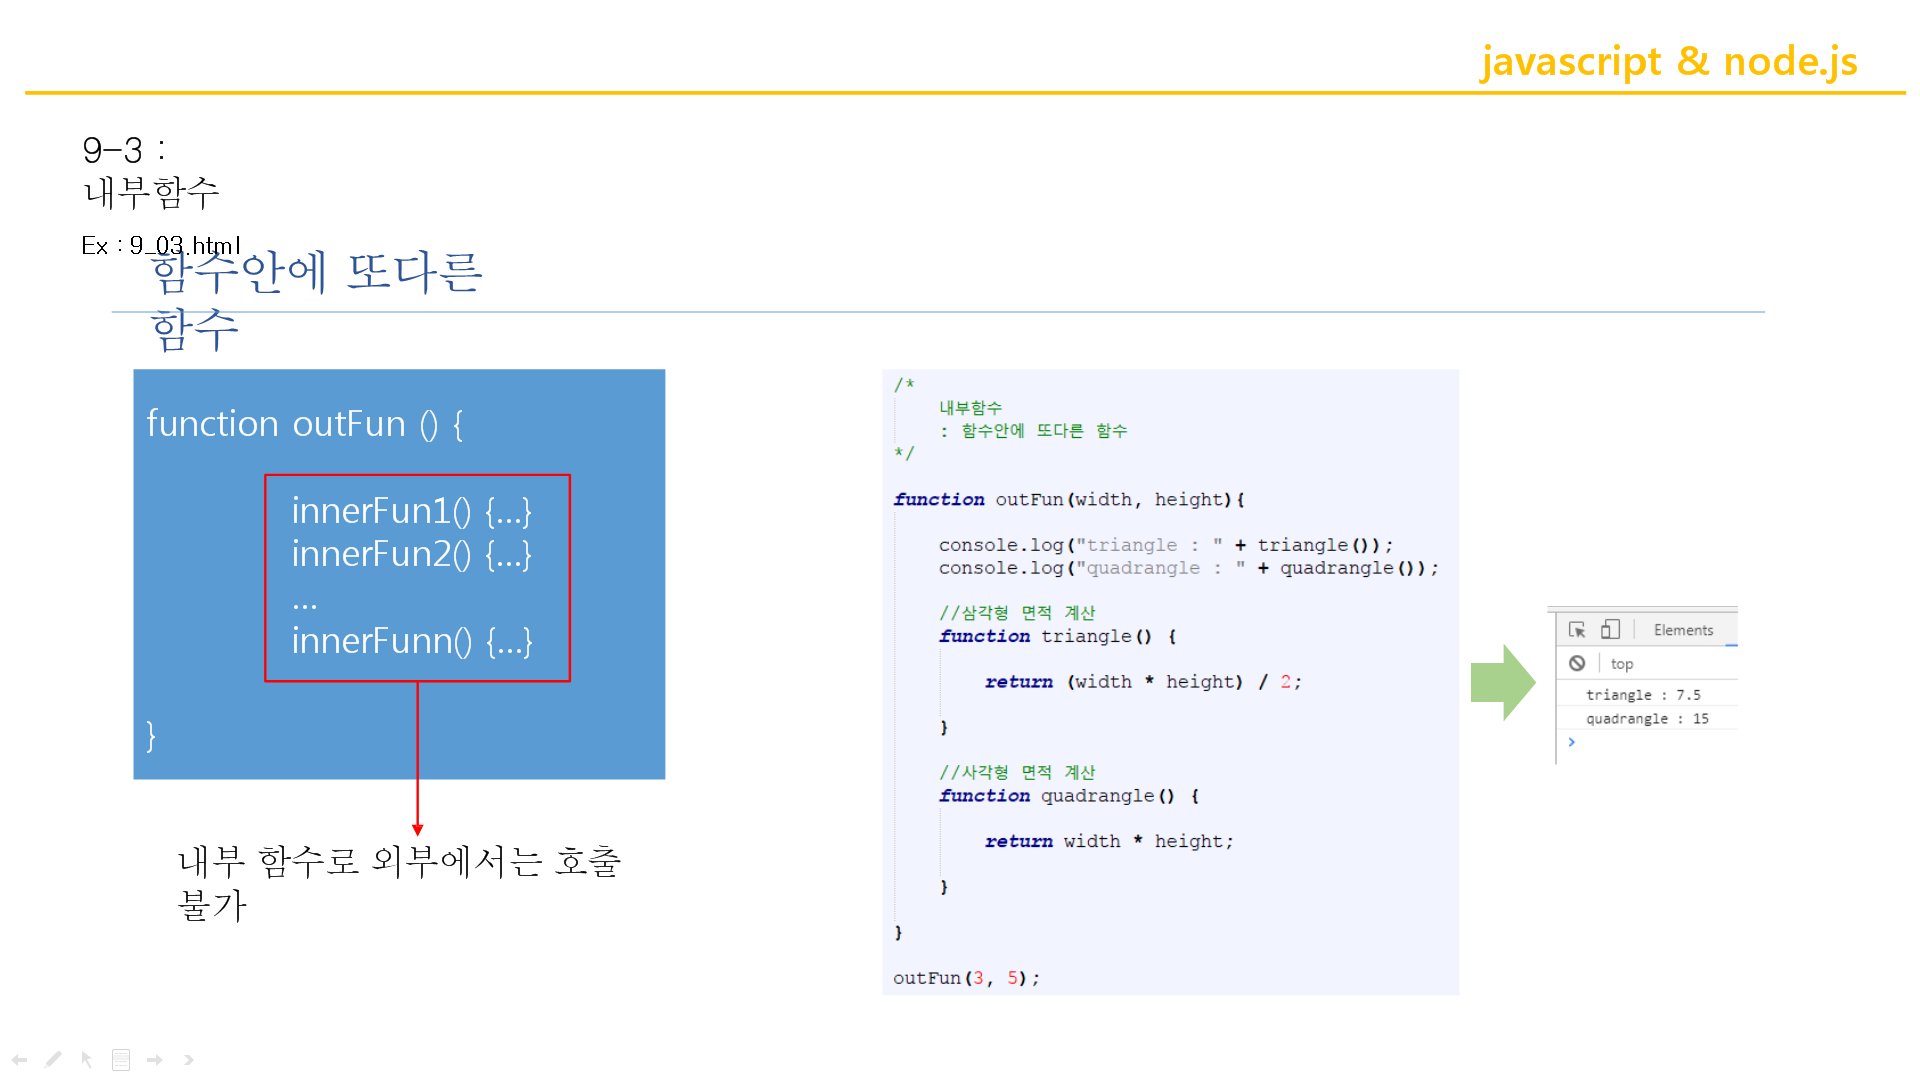
function outFun(width, height) {
console.log("triangle : " + triangle());
console.log("quadrangle : " + quadrangle());
function triangle() {
return (width * height) / 2;
}
function quadrangle() {
return width * height;
}
}
outFun(3, 5);
</script>
</body>
</html>
<콜백함수>
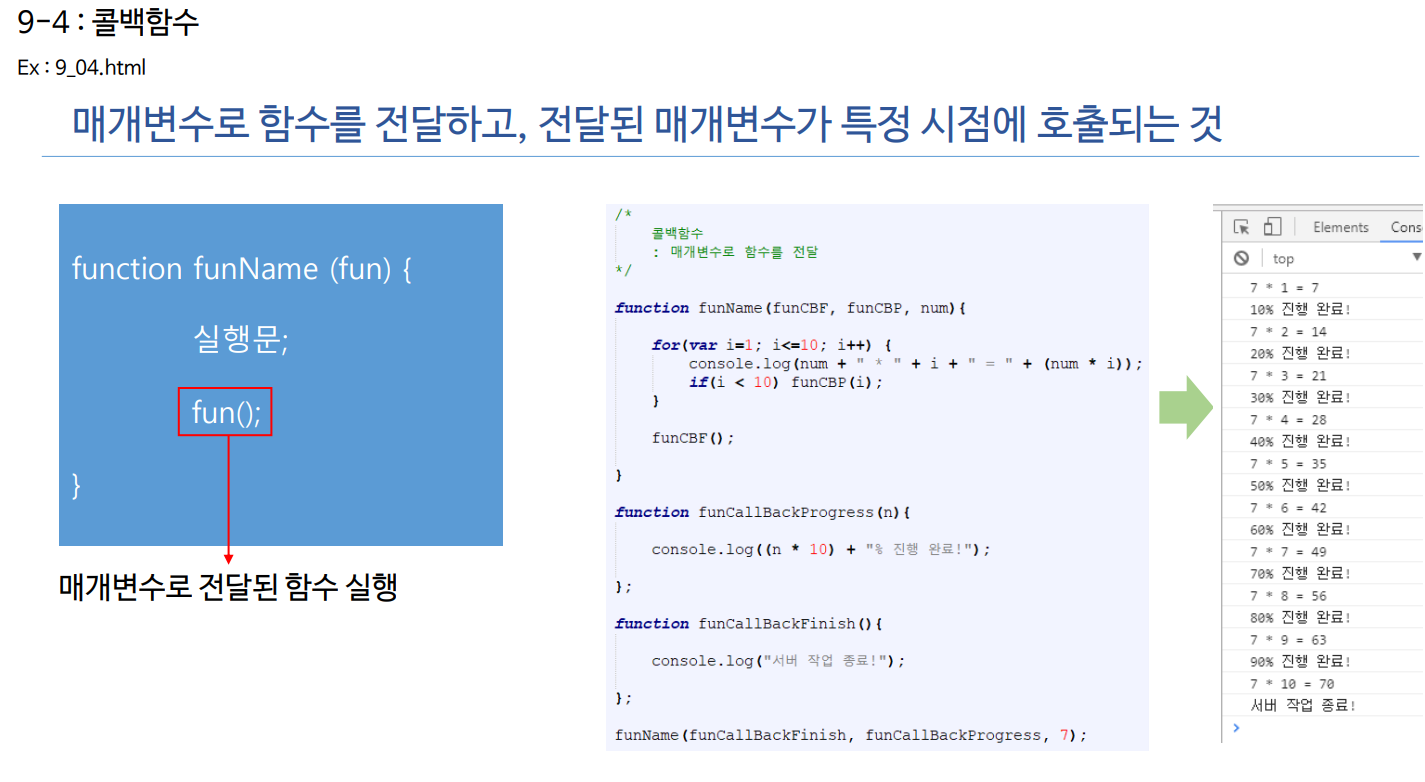
콜백은 다른 함수가 실행을 끝낸 뒤 실행되는 — call back 되는 함수를 말한다.
조금 자세히: 자바스크립트에서 함수는 object이다. 이 때문에 함수는 다른 함수의 인자로 쓰일 수도, 어떤 함수에 의해 리턴될 수도 있다. 이러한 함수를 고차 함수 higher-order functions 라 부르고 인자로 넘겨지는 함수를 콜백 함수 callback function 라고 부른다.
콜백함수 (Callback) cmelcmel.tistory.com/83
- 콜백함수란 사용자가 주체가 되어 사용하는게 아니라 시스템(브라우저, 운영체제 등)
으로 인해 실행되는 함수를 말한다.
- 명시적으로 호출되는 함수가 아니다.
- 개발자가 함수를 등록해두면 특정 시점, 혹은 특정 이벤트가 발생했을 때
시스템 혹은 브라우져가 실행시키는 함수다.
- 다른 함수의 인자로 이용되는 함수
setTimeout, setInterval 함수 사용
setInterval 함수 사용
콜백함수 사용 click
콜백함수 불러와서 사용하기 button 사용 합, 차 구하기
자바스크립트 Array 함수 사용
join 사용
forEach 사용하기
filter(콜백함수(값, 인덱스){})
map과 filter 사용하기 3의배수들만 제곱하기
배열과 map을 사용해서 값뽑아오기
find 사용해서 값 뽑기
sort 사용하기
funCBR(); 함수처럼 호출하고있다.
함수의 파라미터로 함수가 들어간다.
함수도 하나의 자료형(6개 타입 중 하나)이기 때문에!!!(너무나 당연한 것)
<!DOCTYPE html>
<html>
<head>
<meta charset="EUC-KR">
<title>Insert title here</title>
<script type="text/javascript"></script>
<style>
</style>
</head>
<body>
	<script type="text/javascript">
		function funName(funCBF, funCBP, num) {

			for (var i = 1; i <= 10; i++) {
				console.log(num + " * " + i + " = " + (num * i));
				if (i < 10)
					funCBP(i);
			}
			funCBF();
		}
		function funCallBackProgress(n) {
			console.log((n * 10) + "% 진행 완료!");
		}
		function funCallBackFinish() {
			console.log("서버 작업 종료!");
		}
		funName(funCallBackFinish, funCallBackProgress, 7);
	</script>
</body>
</html>

[콜백함수 또 다른 예 setTimeout 함수]
<!DOCTYPE html>
<html>
<head>
<meta charset="EUC-KR">
<title>Insert title here</title>
<script type="text/javascript"></script>
<style>
</style>
</head>
<body>
	<script type="text/javascript">
		var printTimeOutId = setTimeout(function() {
			clearInterval(printIntervalId);
			console.log("종료!");
		}, 7000);
		var printIntervalId = setInterval(function() {
			console.log("*")
		}, 2000);

		var varEval = "console.lot('eval함수!')";

		varEval = " document.write('<p>eval함수</p>');";
		eval(varEval);
	</script>
</body>
</html>

printTimeOutId는 즉시 완료될 수 없는 코드를 포함하고있다.
setTimeout함수는 지정된 시간이 지난 후에 함수를 call한다.
' * ' 먼저 출력 후 종료를 출력한다.
먼저 출력된 후 종료가 출력된다.

(PT)Javascript와_Node.js_10강_객체-기본

객체는 {}로 표현. 배열은 []로 표현


<!DOCTYPE html>
<html>
<head>
<meta charset="EUC-KR">
<title>Insert title here</title>
<script type="text/javascript"></script>
<style>
</style>
</head>
<body>
<script type="text/javascript">
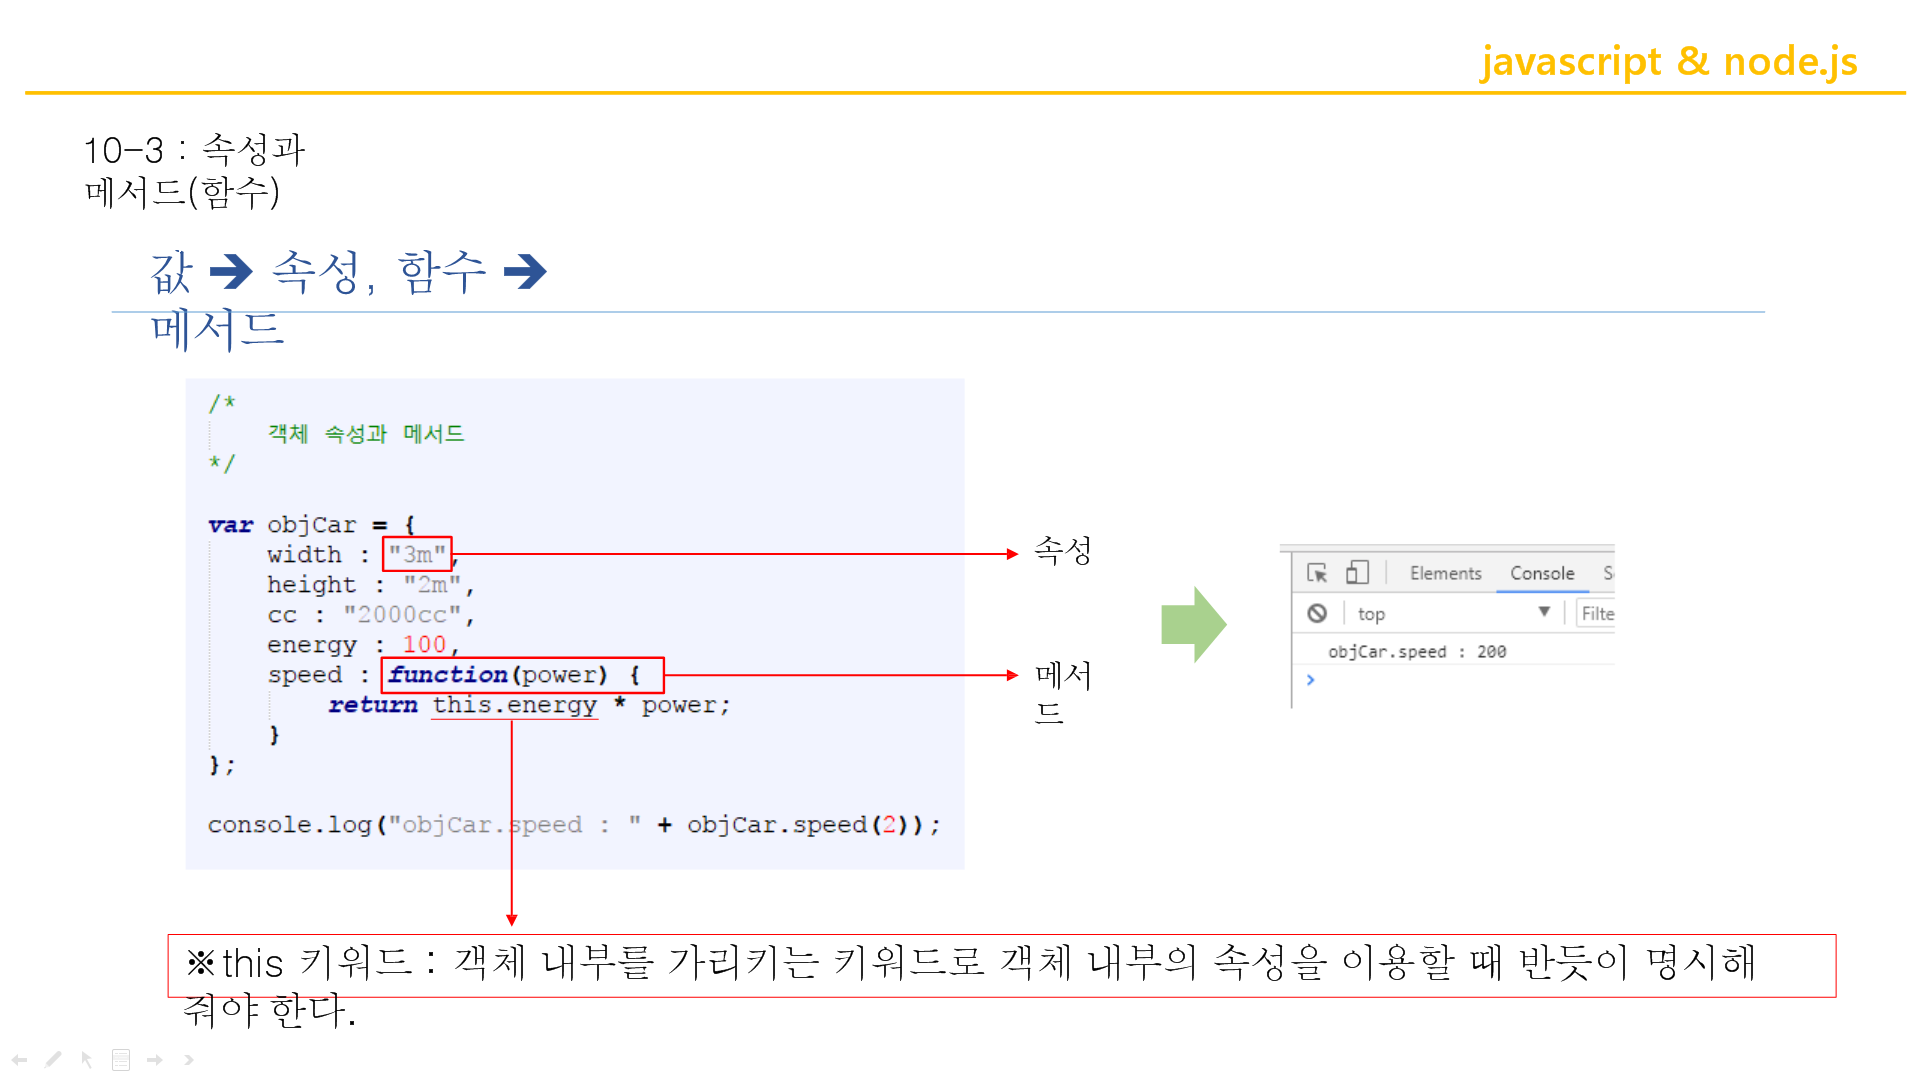
var objCar = {
width : "3m",
height : "2m",
cc : "2000cc",
energy : 100,
speed : function(power) {
return this.energy * power;
}
};
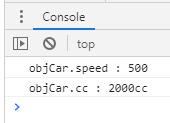
console.log("objCar.speed : " + objCar.speed(5));
console.log("objCar.cc : " + objCar.cc);
</script>
</body>
</html>
접근은 다 . 점 으로 접근한다!
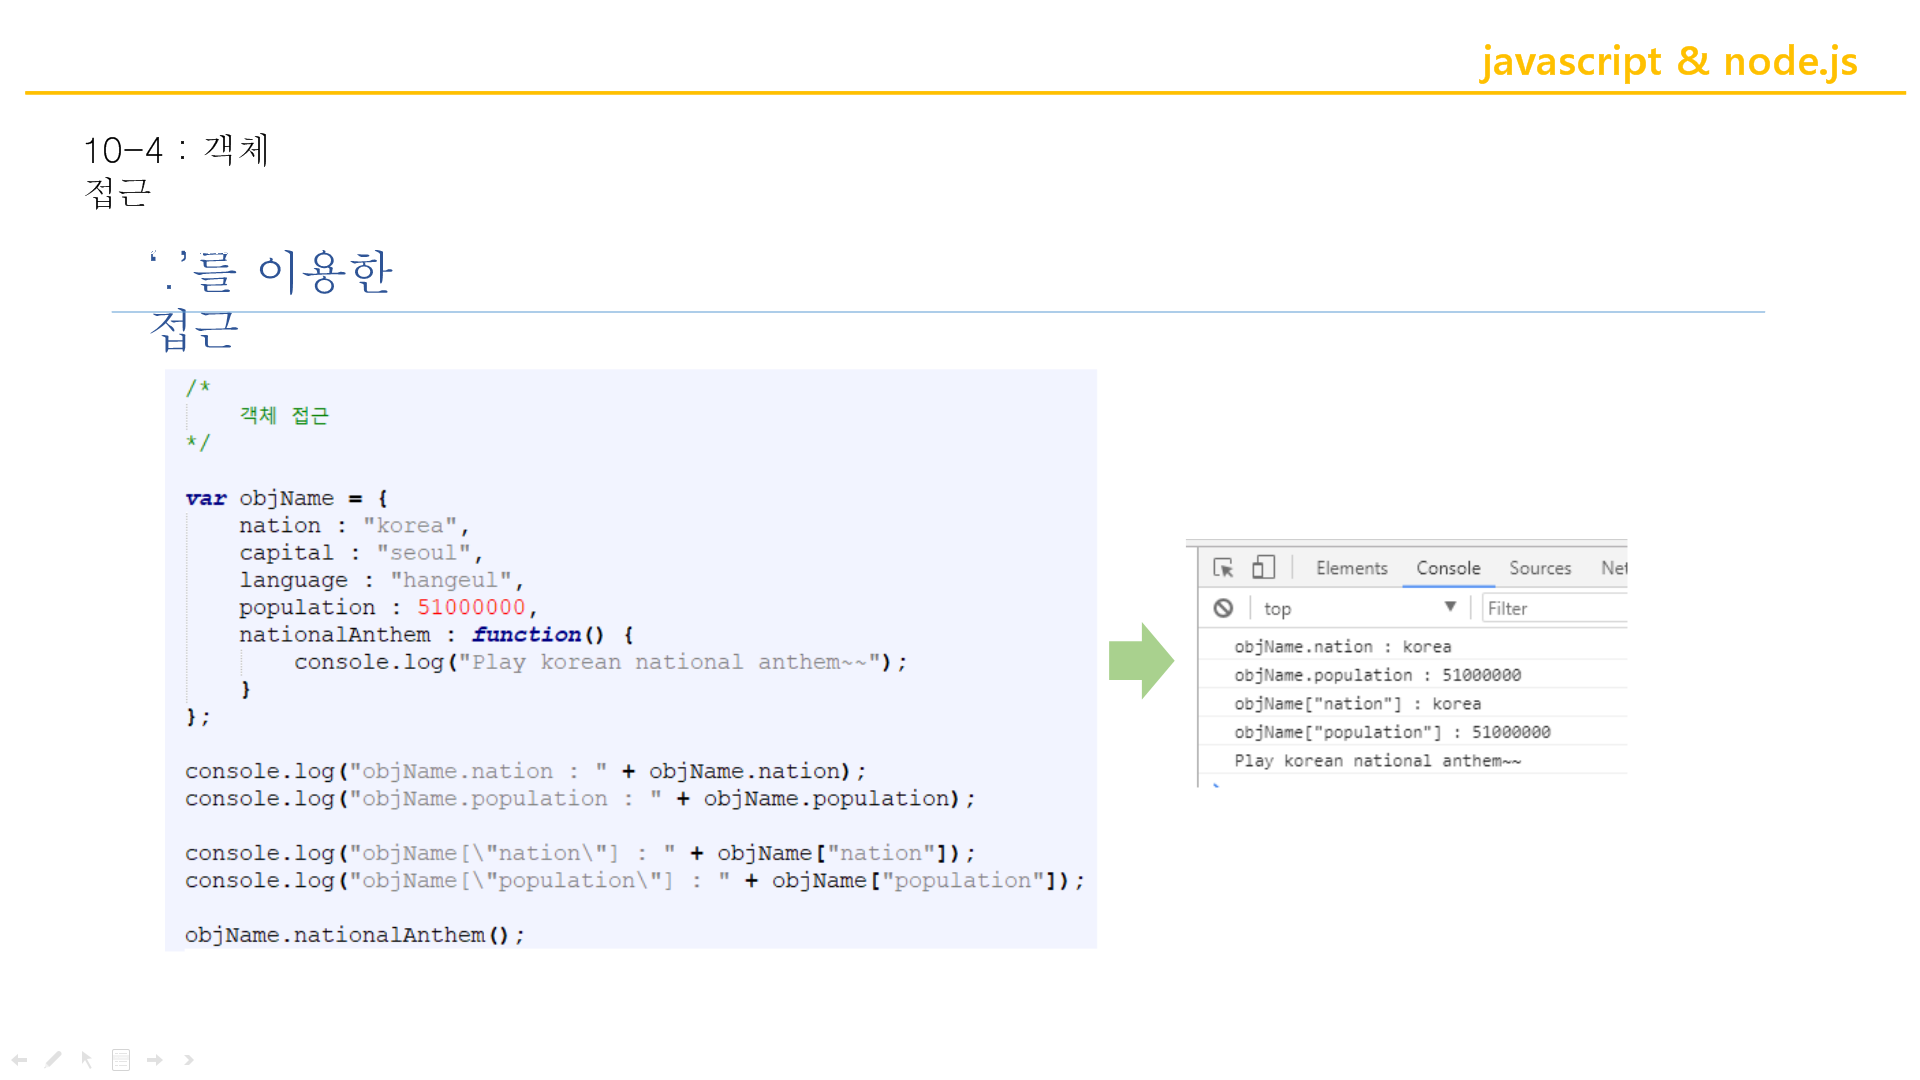
↑
점 말고 [" "] 이걸로도 접근이 가능하다!
↑변수를 String으로 받았기 때문에 배열이 가능한것.
<!DOCTYPE html>
<html>
<head>
<meta charset="EUC-KR">
<title>Insert title here</title>
<script type="text/javascript"></script>
<style>
</style>
</head>
<body>
<script type="text/javascript">
var objCar = {
width : "3m",
height : "2m",
cc : "2000cc",
energy : 100,
speed : function(power) {
return this.energy * power;
}
};
var print = "";
//""; 는 해당 문자열로 선언
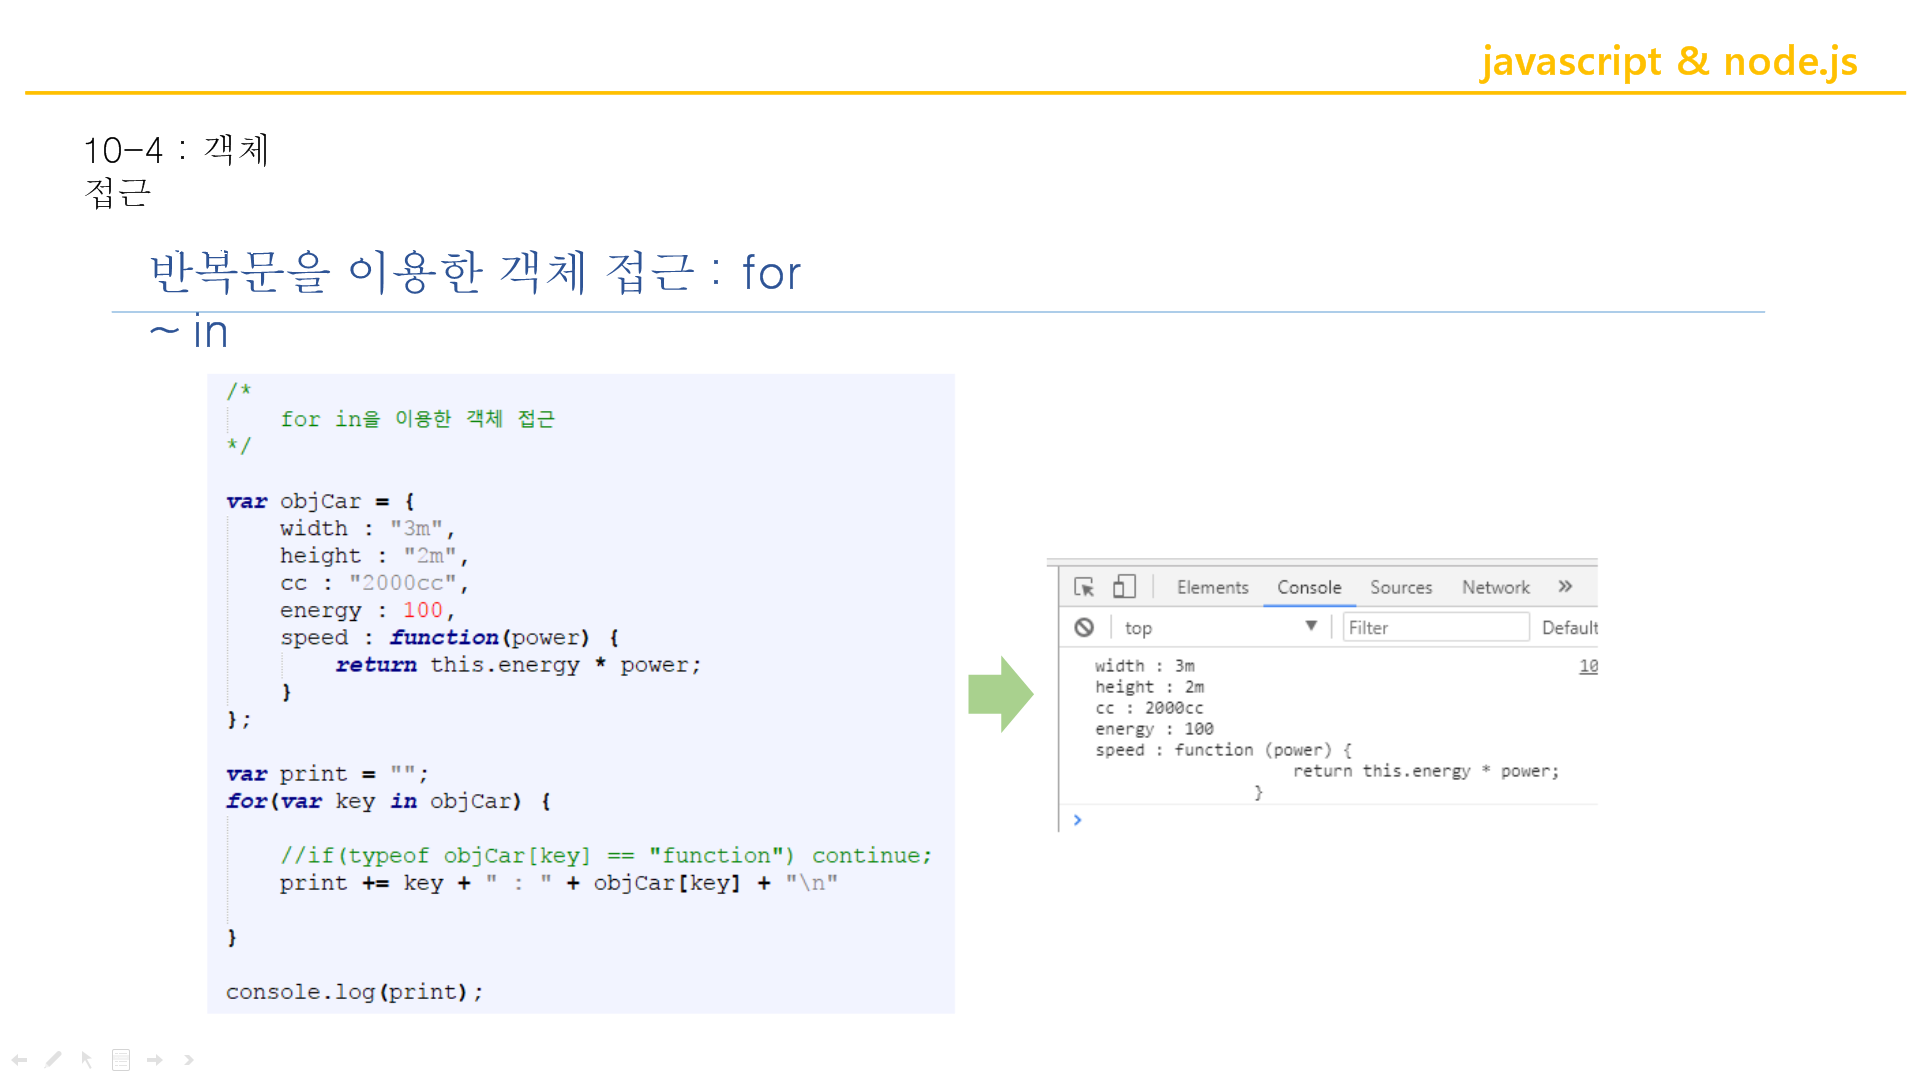
for ( var key in objCar) {
//for-each랑 똑같
print += key + " : " + objCar[key] + "\n"
//또는 objCar.key
}
console.log(print);
</script>
</body>
</html>
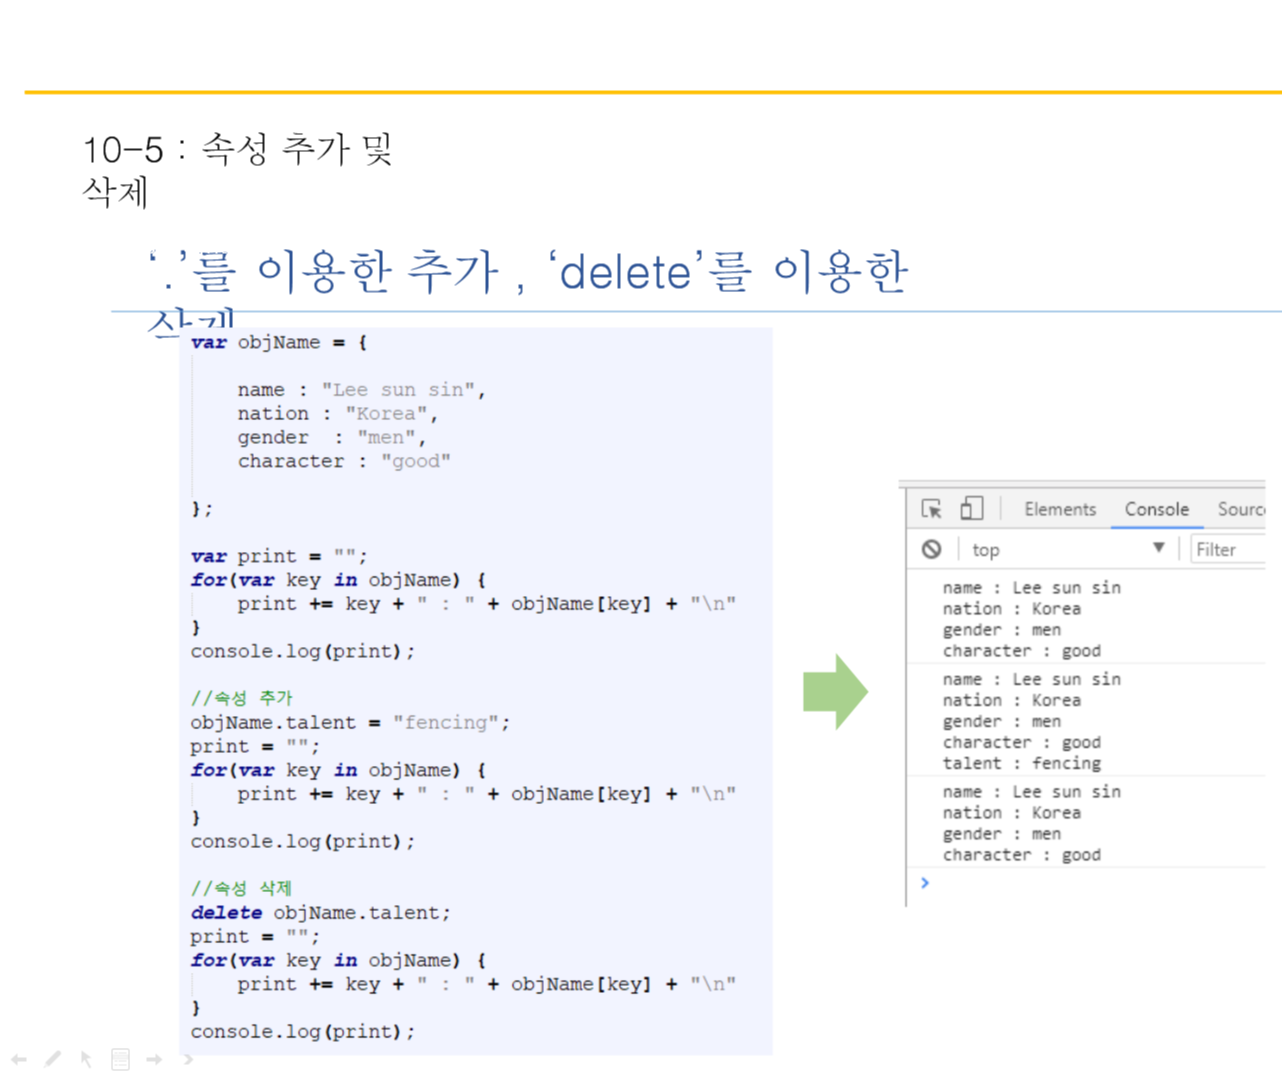
추가 삭제도 가능하다.
<!DOCTYPE html>
<html>
<head>
<meta charset="EUC-KR">
<title>Insert title here</title>
<script type="text/javascript"></script>
<style>
</style>
</head>
<body>
	<script type="text/javascript">
		var objName = {
				name : "Lee sun sin",
				nation : "Korea",
				gender : "men",
				character : "good"
		};
		var print = "";
		for(var key in objName){
			print += key + " : " + objName[key] + "\n"
		}
		console.log(print);

		objName.talent = "fencing";
		print = "";
		for(var key in objName){
			print += key + " : " + objName[key] + "\n"
		}
		console.log(print);

		delete objName.talent;
		print = "";
		for(var key in objName){
			print += key + " : " + objName[key] + "\n"
		}
		console.log(print);
	</script>
</body>
</html>
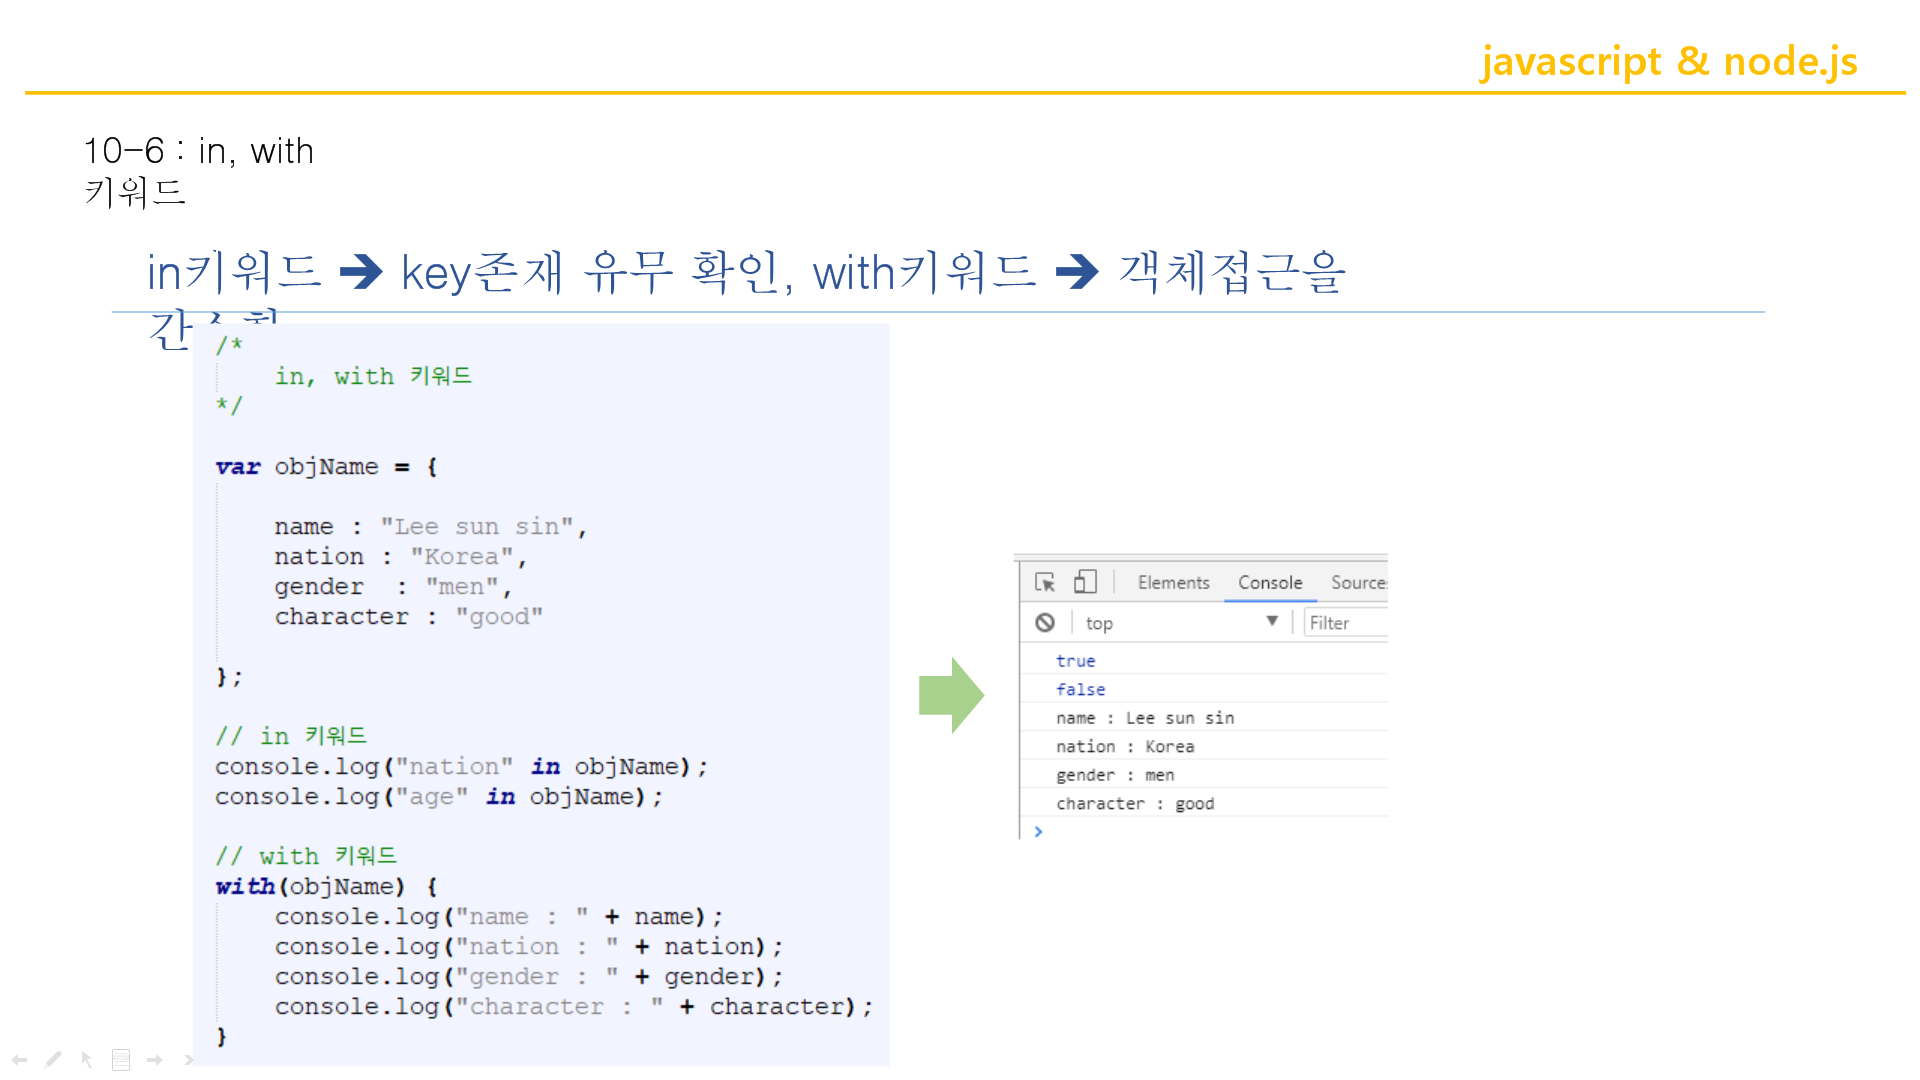
in키워드
이것만이라도 기억!
var 로 객체 만들고 .으로 호출!
(PT)Javascript와_Node.js_11강_객체-심화

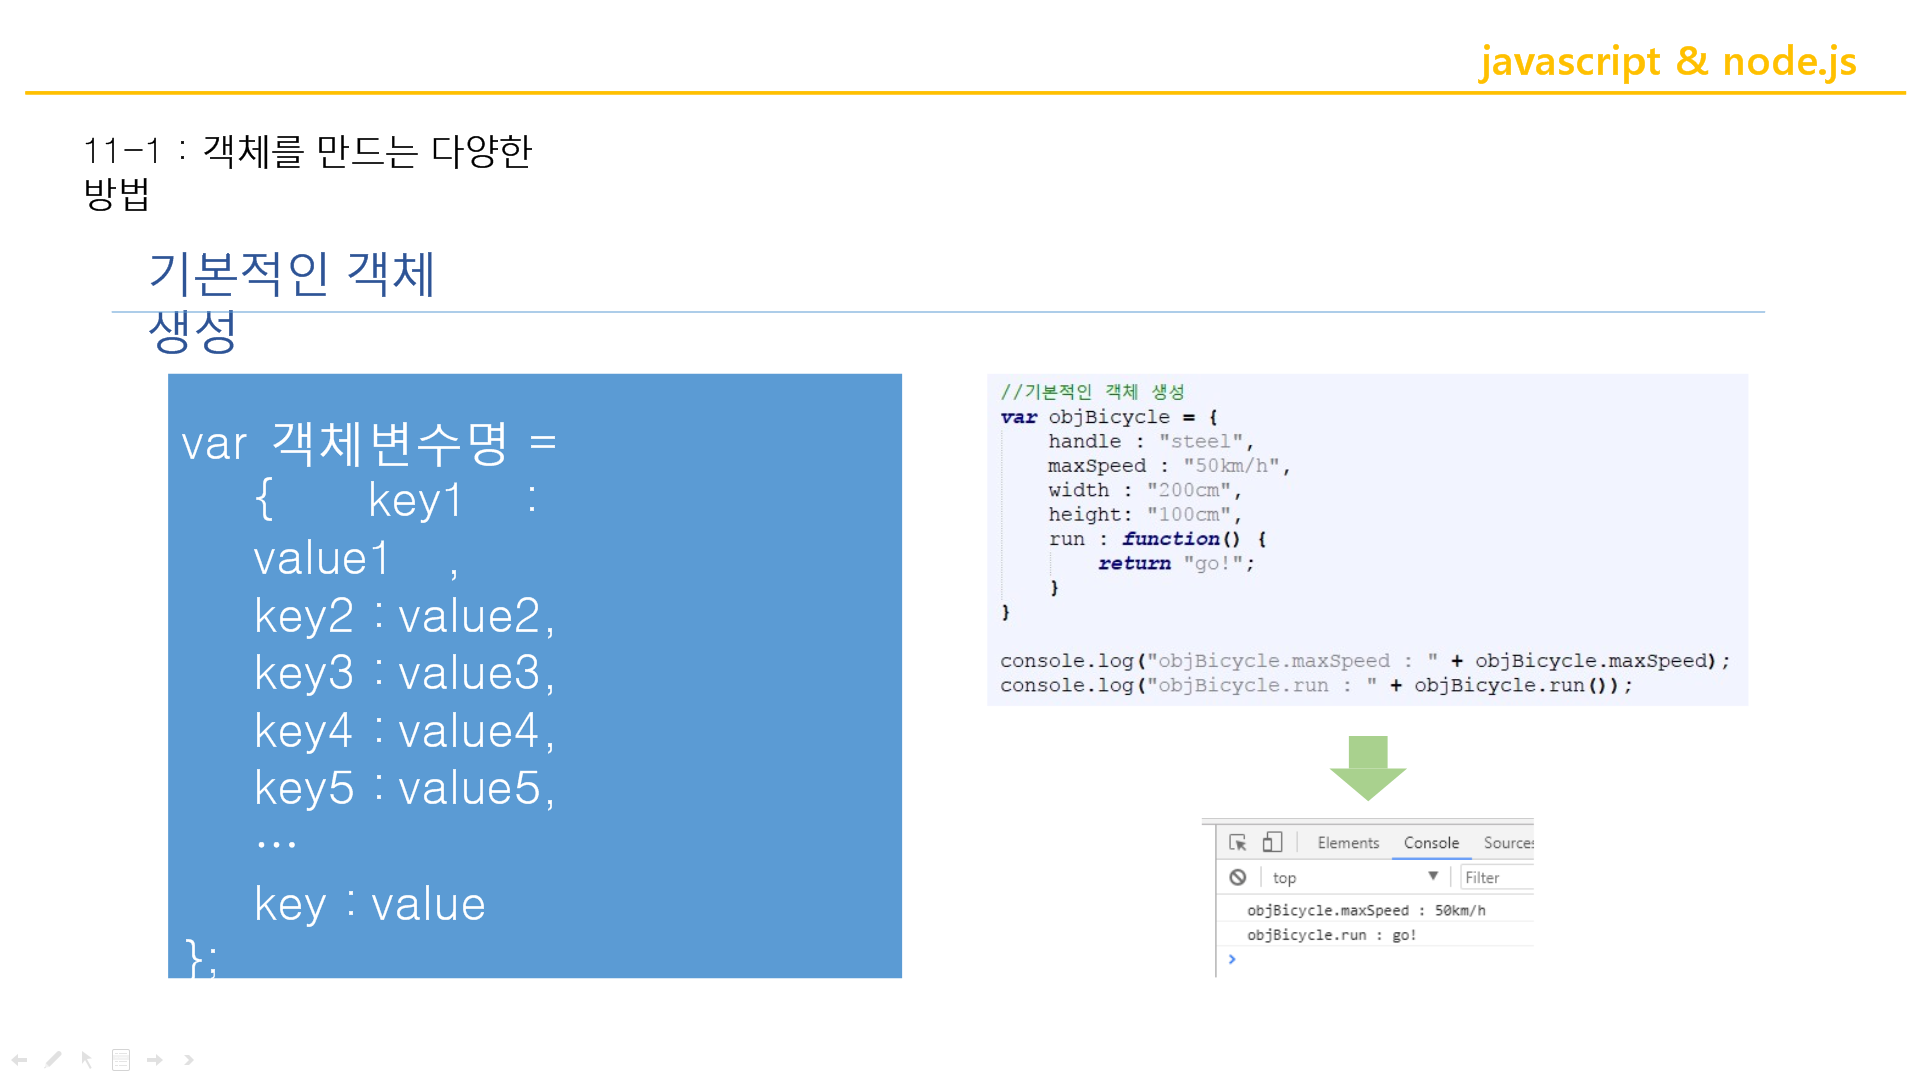
key : value는 객체생성 하는 것 중 하나의 종류.
<!DOCTYPE html>
<html>
<head>
<meta charset="EUC-KR">
<title>Insert title here</title>
<script type="text/javascript"></script>
<style>
</style>
</head>
<body>
<script type="text/javascript">
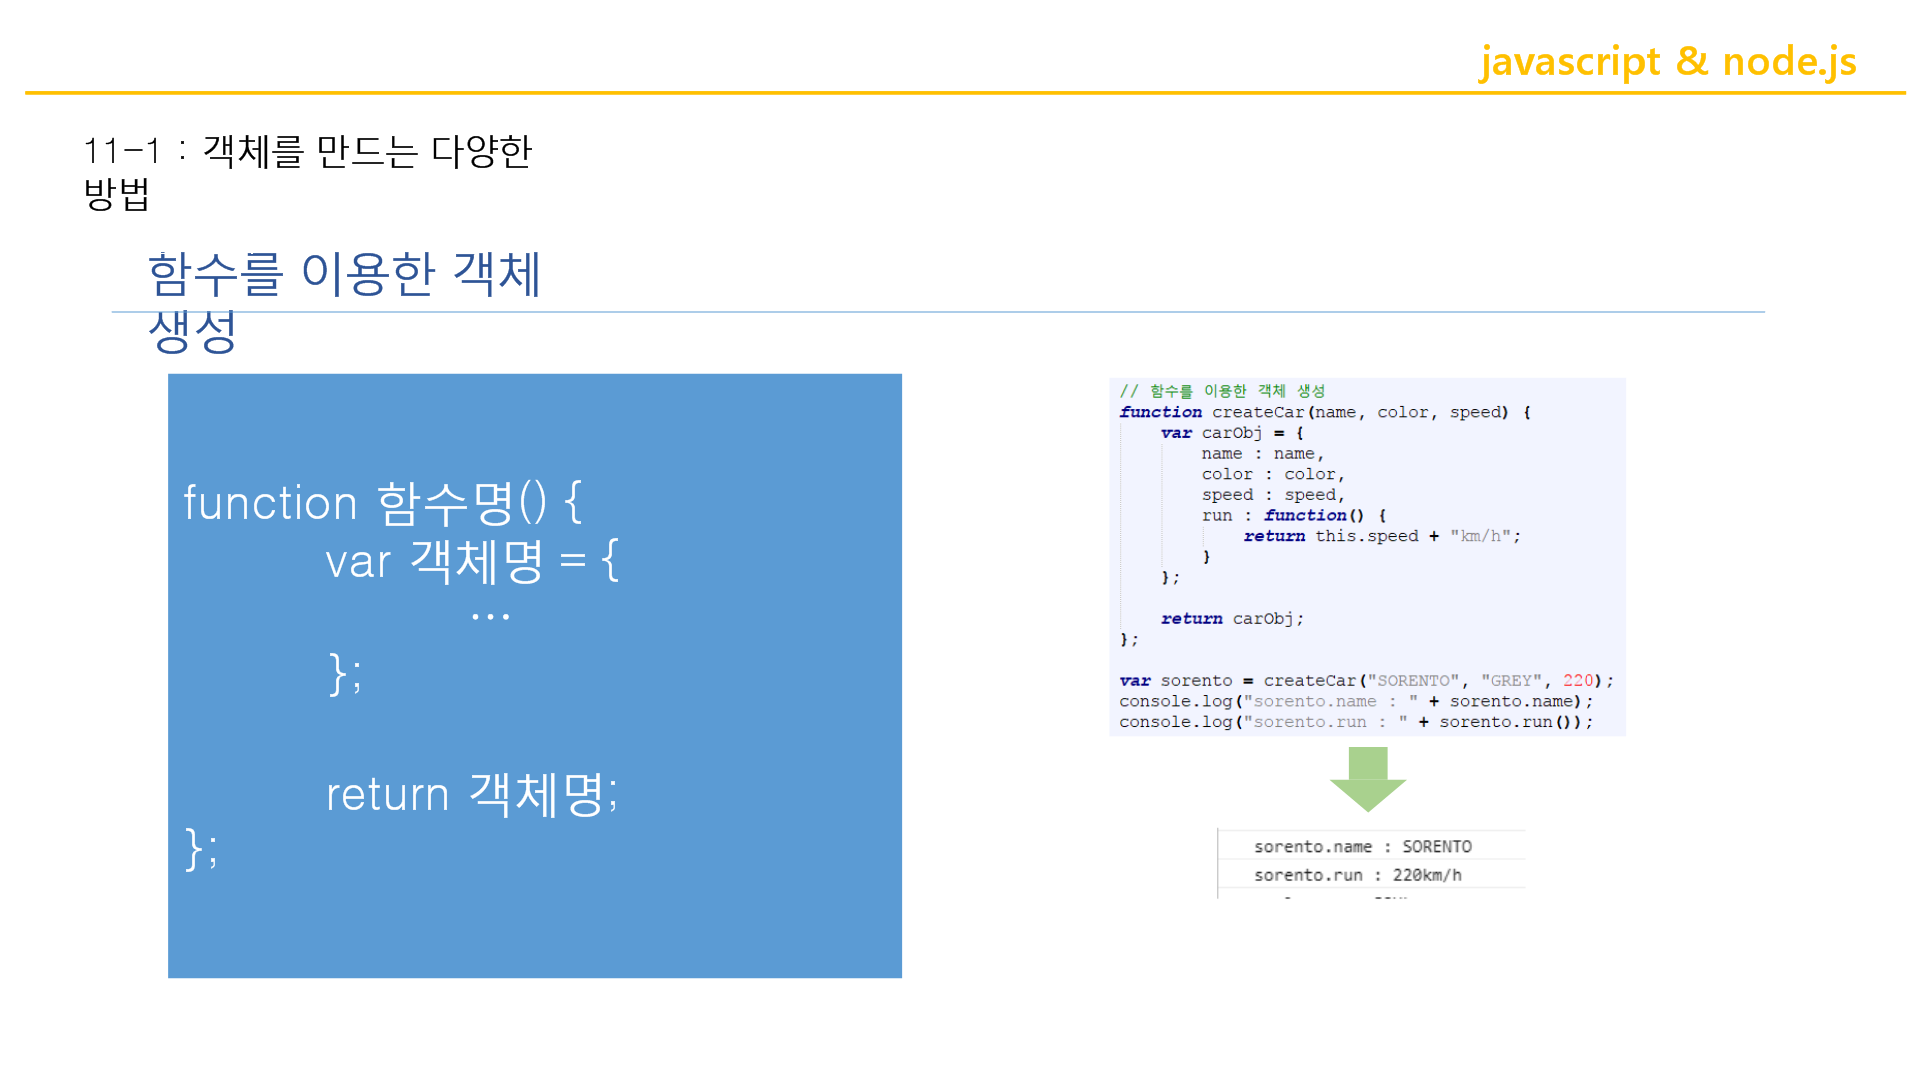
function createCar(name, color, speed){
var carObj = {
name : name,
color : color,
speed : speed,
run : function(){
return this.speed +"km/h";
}
}
return carObj;
}
var sorento = createCar("SORENTO", "GREY", 220);
console.log("sorento.name : " + sorento.name);
console.log("sorento.run : " + sorento.run());
//sorento. 로 호출, run은 ()붙여줘야함
</script>
</body>
</html>

생성자는 function 하고 대문자로 생성자함수명을 준다. 생성자라고 말을 붙였을뿐 결국 함수임.
ex. function Airplane(name, color, speed){ }
따라서 생성자 함수는 this.형태로 변수 선언. 그리고 new 로 객체 선언해준다!
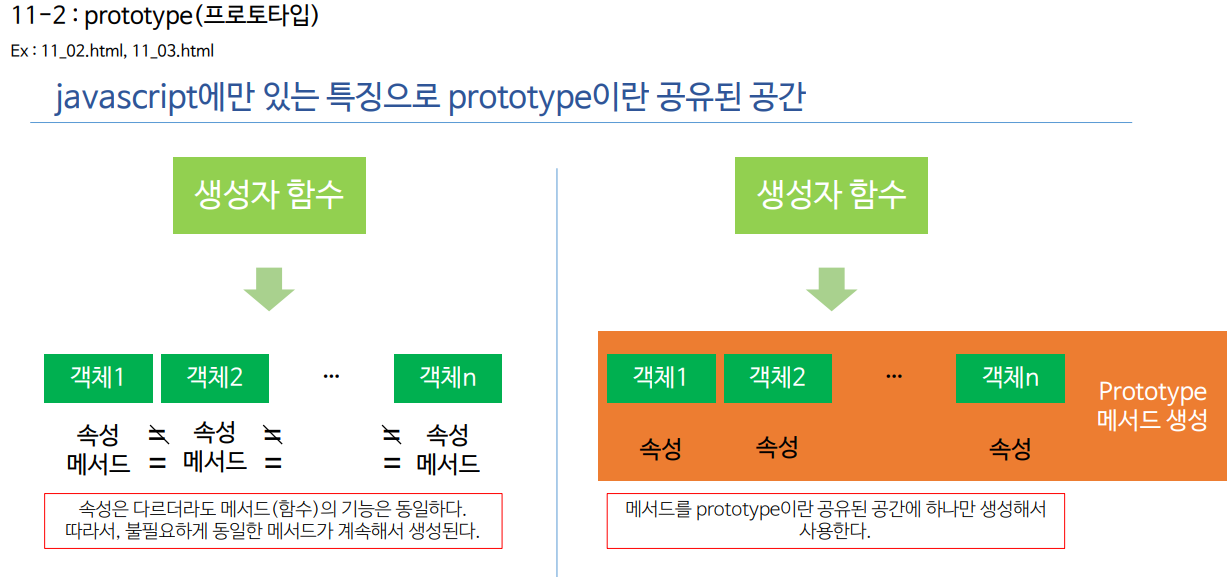
어려운 prototype.. 프로토타입..
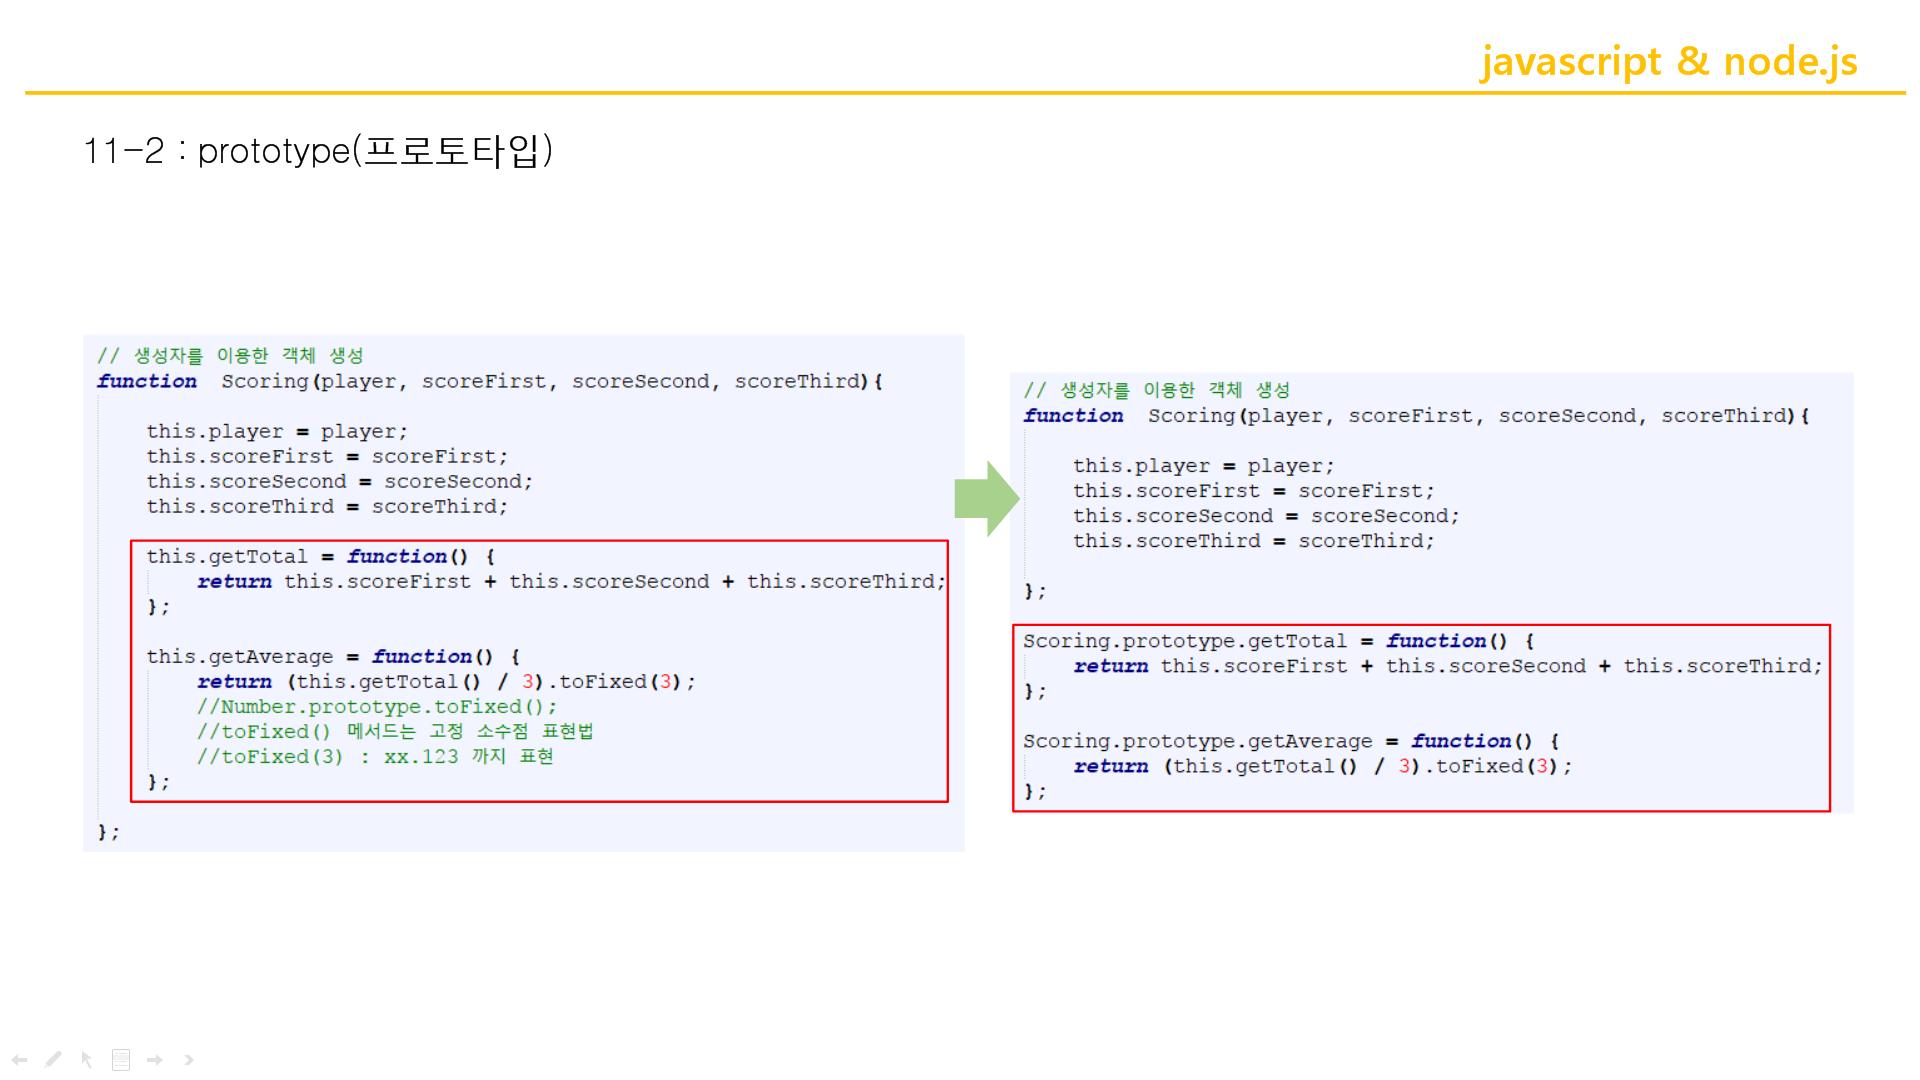
↑this.getTotal 에 return으로 더한거 ㄱㄱ
Scoring.prototype.getTotal은 차차 알아가기. 어렵기때문...............
prototype은 모든 객체를 받는다고 생각하기.
prototype을 통해서 생성하면 계속 new를 줘도 메모리에 한번만 올라간다.
prototype쓰기어려우면 왼쪽 코드로 쓰기..
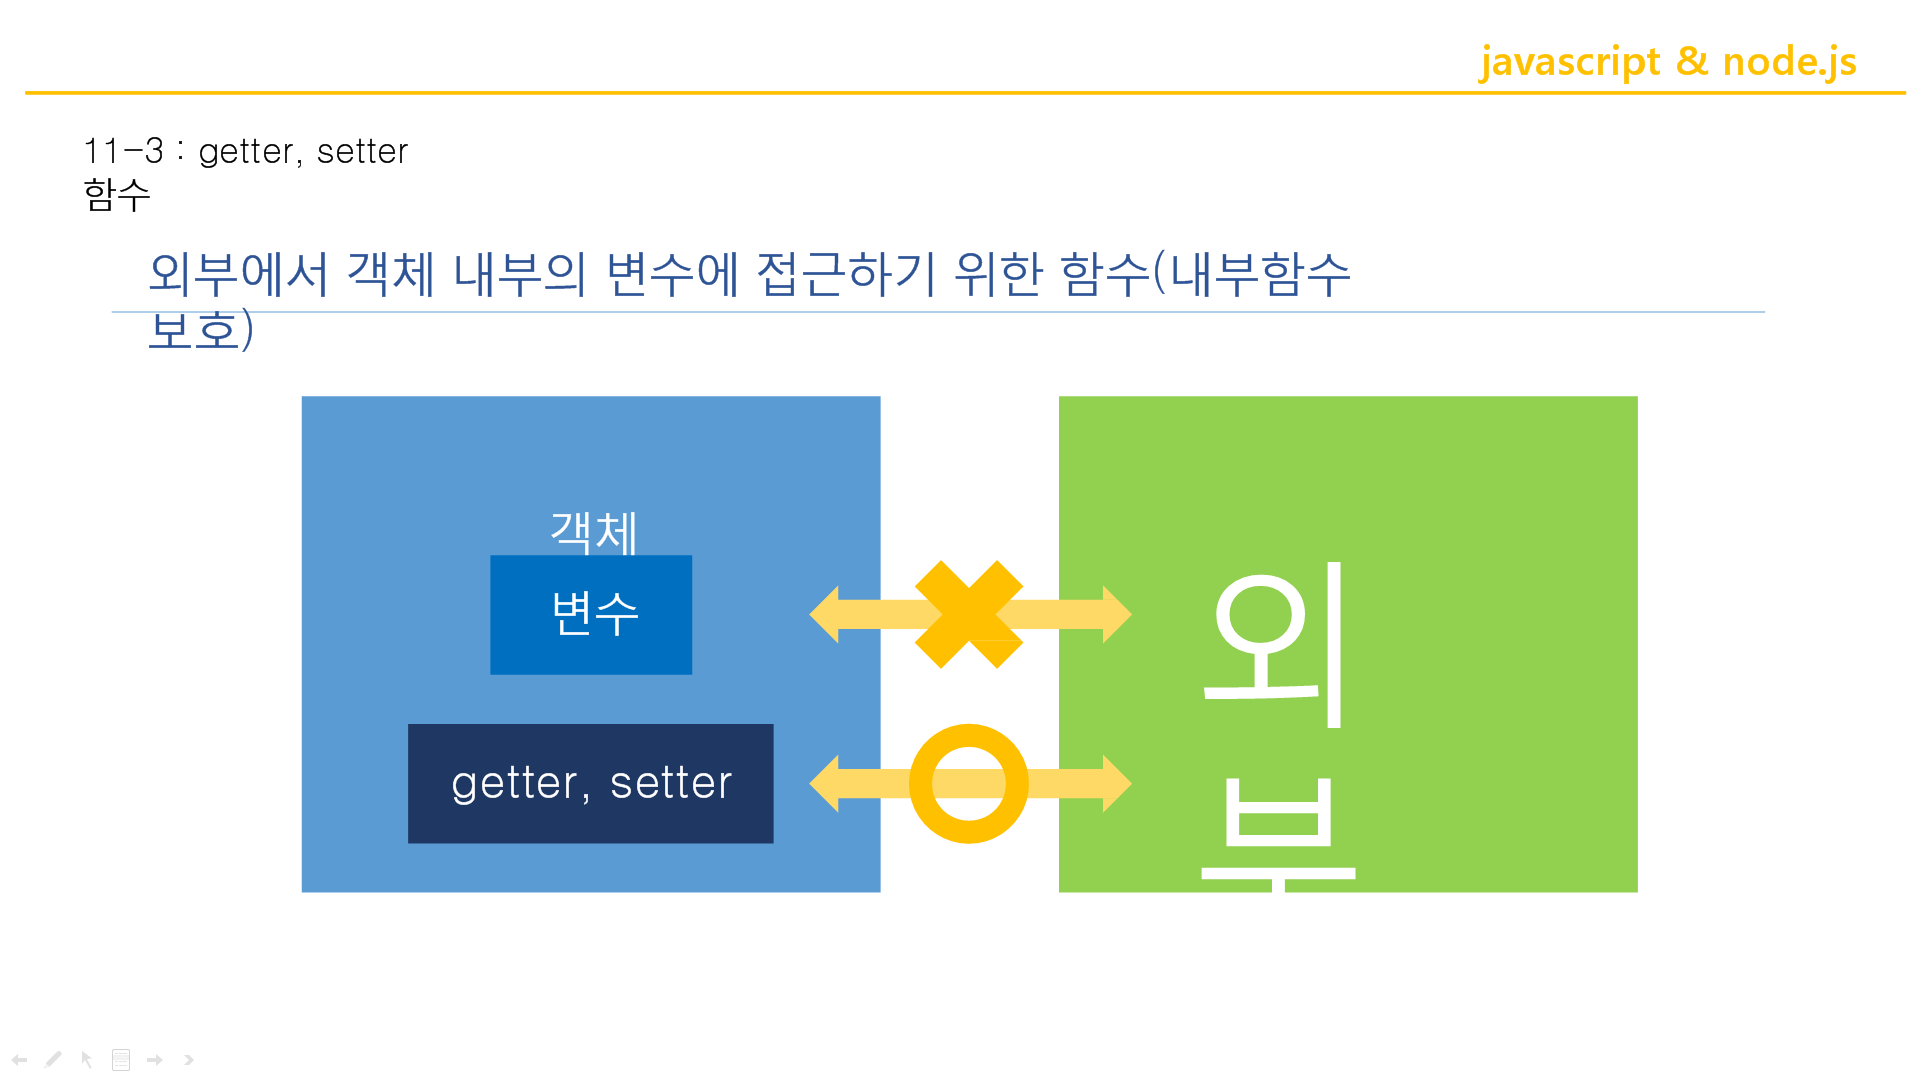
자바스크립트의 getter setter

↑이런식으로 짜는게 전형적인 코드 잘짜는 사람의 코드. 이런식으로 코드 짤것!
<!DOCTYPE html>
<html>
<head>
<meta charset="EUC-KR">
<title>Insert title here</title>
<script type="text/javascript"></script>
<style>
</style>
</head>
<body>
<script type="text/javascript">
function BMICalculator() {
var height = 0;
var weight = 0;
this.bmi = function() {
return (this.weight / (this.height * this.height)).toFixed(2);
}
this.getHeigth = function() {
return this.height;
}
this.setHeight = function(height) {
if (!isNaN(height)) {
//NaN은 숫자가 아님 //!isNaN는 결국 숫자라는 의미
this.height = height;
} else {
console.log("heigth is NaN(Not a Number)")
}
}
this.getWeight = function() {
return this.weight;
}
this.setWeight = function(weight) {
if (!isNaN(weight)) {
this.weight = weight;
} else {
console.log("weight is NaN(Not a Number)!");
}
}
}
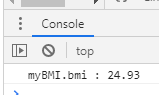
var myBMI = new BMICalculator();
//객체 생성
myBMI.setHeight(1.9);
myBMI.setWeight(90);
console.log("myBMI.bmi : " + myBMI.bmi());
</script>
</body>
</html>
Spring
Java_자바_Spring_스프링_강의_05강_DI활용

↓maven 폴더 / 클래스 만드는 방법!
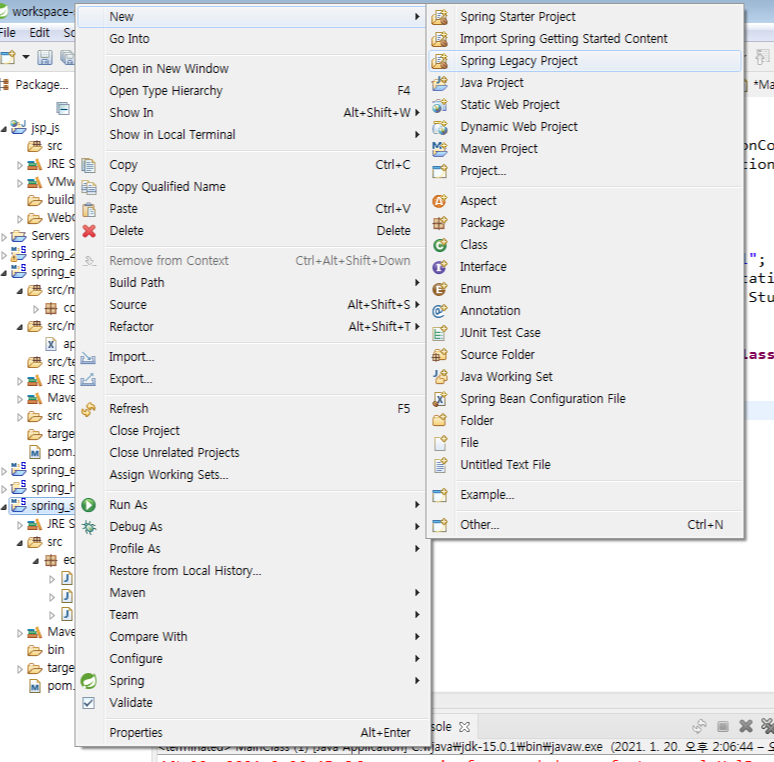

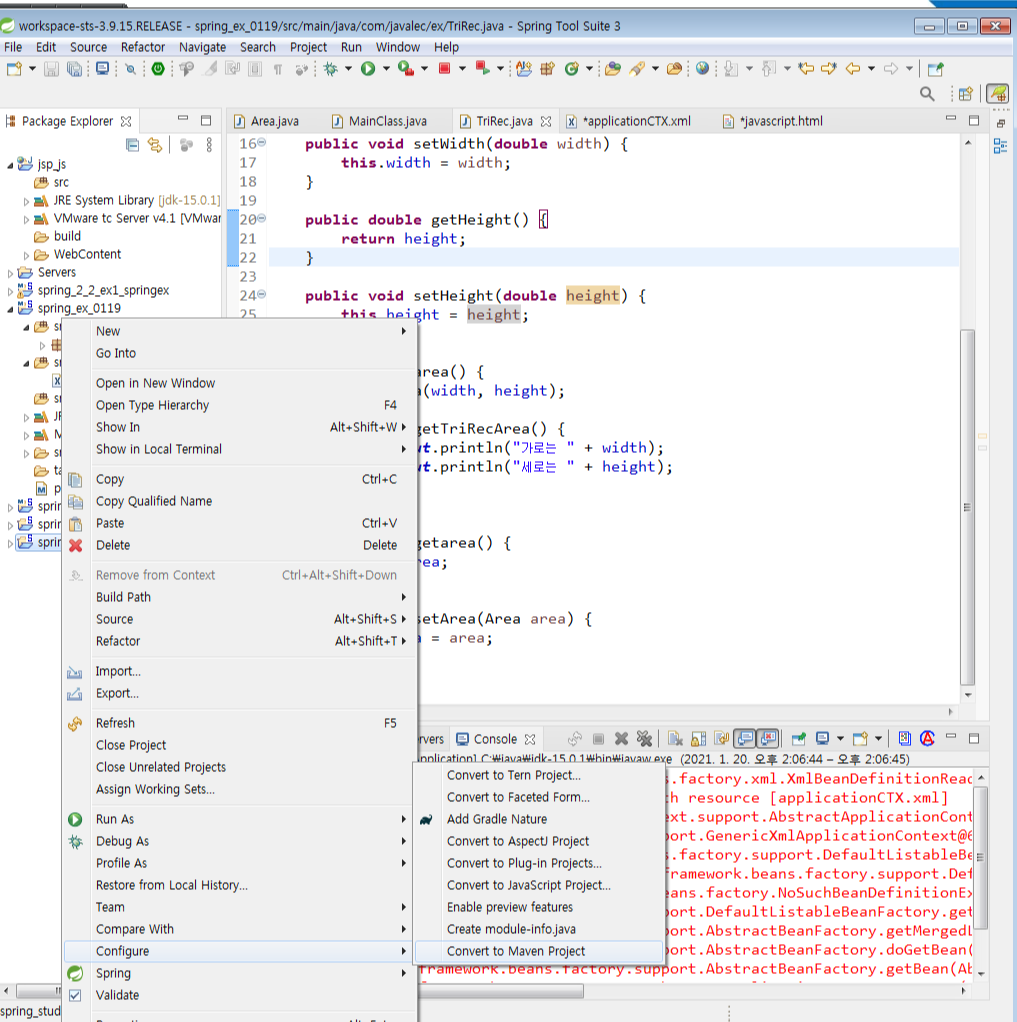
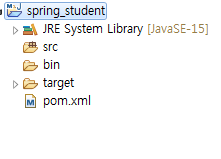
이렇게 폴더에 M이 생기게 변경~
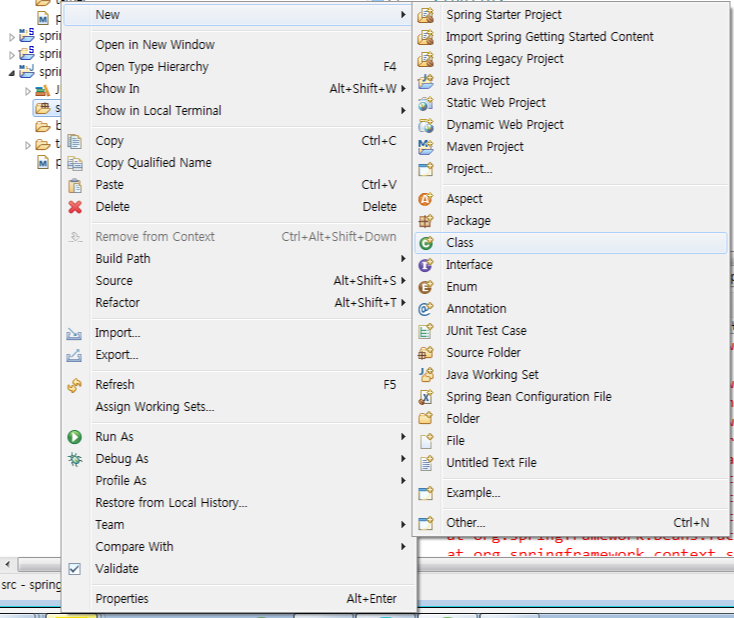
↓Main class 생성
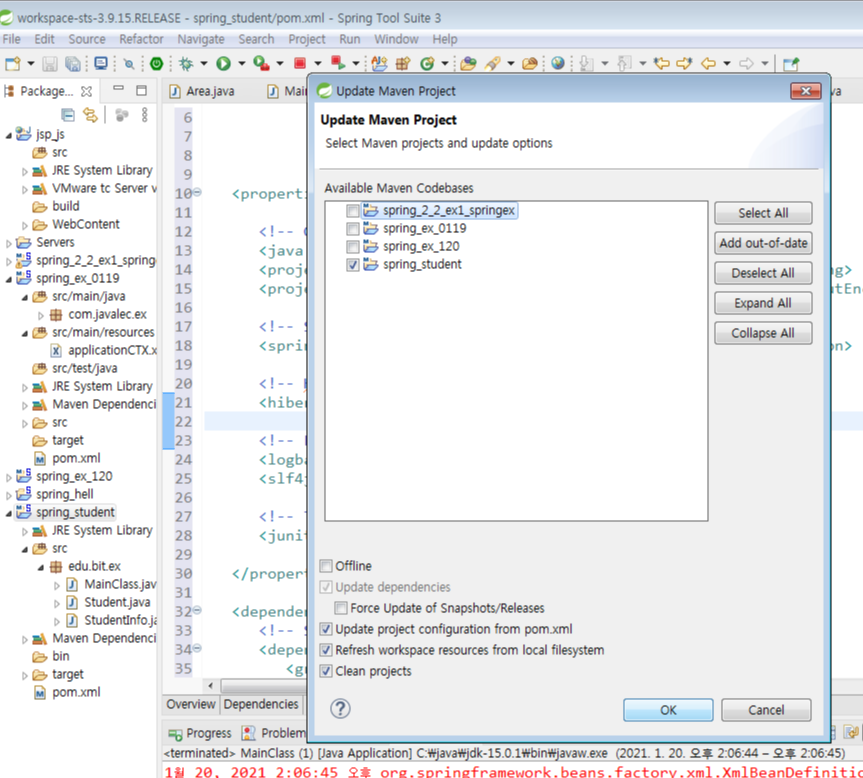
빨간줄 쳐진 부분은 org.springframework.~~ import시켜줘야함 얘에대한 .class가 있는데 어디서 받아옴? Spring사이트에서 받아서 알집넣은것처럼 넣어야함. 근데 maven이 생긴이후부터 pom.xml에서 수정. 매우간편s
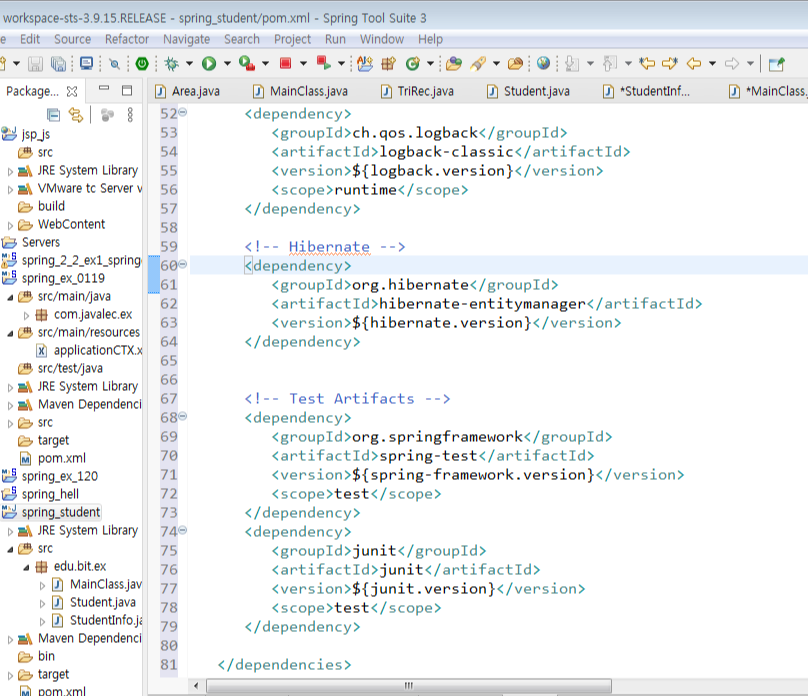
[pom.xml]  - 이렇게 설정하고 무조건 저장누른다음 다음 단계 ㄱㄱ
  <version>0.0.1-SNAPSHOT</version>
  얘와

 <properties>

      <!-- Generic properties -->
      <java.version>1.6</java.version>
      <project.build.sourceEncoding>UTF-8</project.build.sourceEncoding>
      <project.reporting.outputEncoding>UTF-8</project.reporting.outputEncoding>

      <!-- Spring -->
      <spring-framework.version>3.2.3.RELEASE</spring-framework.version>

      <!-- Hibernate / JPA -->
      <hibernate.version>4.2.1.Final</hibernate.version>

      <!-- Logging -->
      <logback.version>1.0.13</logback.version>
      <slf4j.version>1.7.5</slf4j.version>

      <!-- Test -->
      <junit.version>4.11</junit.version>

   </properties>

   <dependencies>
      <!-- Spring and Transactions -->
      <dependency>
         <groupId>org.springframework</groupId>
         <artifactId>spring-context</artifactId>
         <version>${spring-framework.version}</version>
      </dependency>
      <dependency>
         <groupId>org.springframework</groupId>
         <artifactId>spring-tx</artifactId>
         <version>${spring-framework.version}</version>
      </dependency>

      <!-- Logging with SLF4J & LogBack -->
      <dependency>
         <groupId>org.slf4j</groupId>
         <artifactId>slf4j-api</artifactId>
         <version>${slf4j.version}</version>
         <scope>compile</scope>
      </dependency>
      <dependency>
         <groupId>ch.qos.logback</groupId>
         <artifactId>logback-classic</artifactId>
         <version>${logback.version}</version>
         <scope>runtime</scope>
      </dependency>

      <!-- Hibernate -->
      <dependency>
         <groupId>org.hibernate</groupId>
         <artifactId>hibernate-entitymanager</artifactId>
         <version>${hibernate.version}</version>
      </dependency>


      <!-- Test Artifacts -->
      <dependency>
         <groupId>org.springframework</groupId>
         <artifactId>spring-test</artifactId>
         <version>${spring-framework.version}</version>
         <scope>test</scope>
      </dependency>
      <dependency>
         <groupId>junit</groupId>
         <artifactId>junit</artifactId>
         <version>${junit.version}</version>
         <scope>test</scope>
      </dependency>

   </dependencies>


   얘 사이
   <build>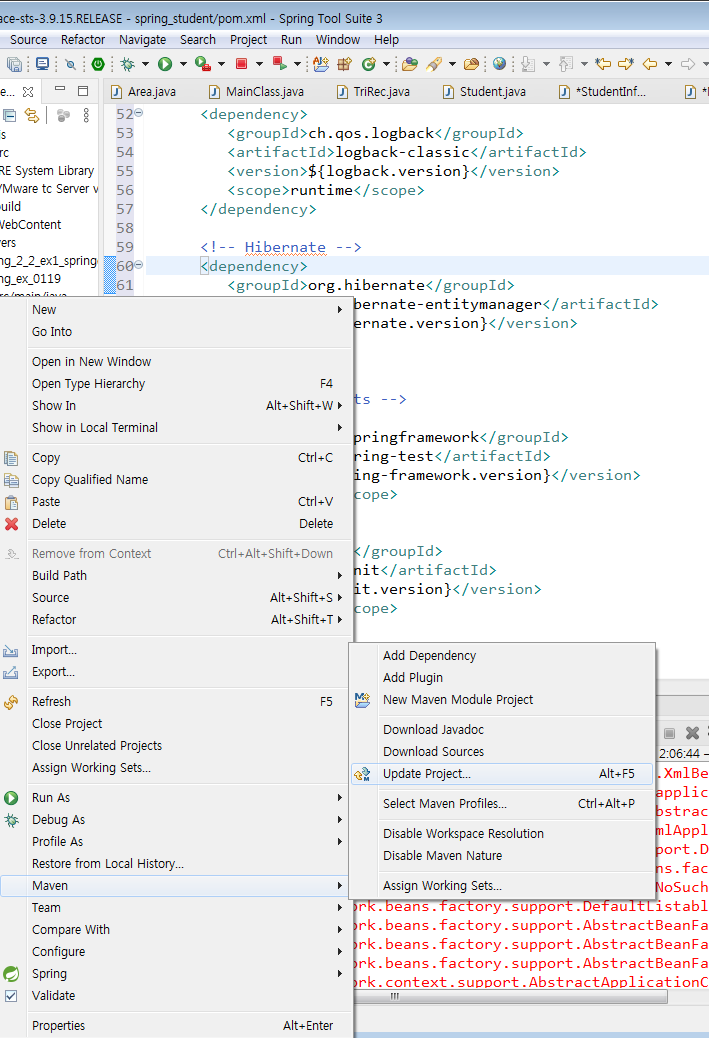
따라라란~~
이걸로 만든 폼으로는 다른 classpath를 갖게됨
=========이제 코드============

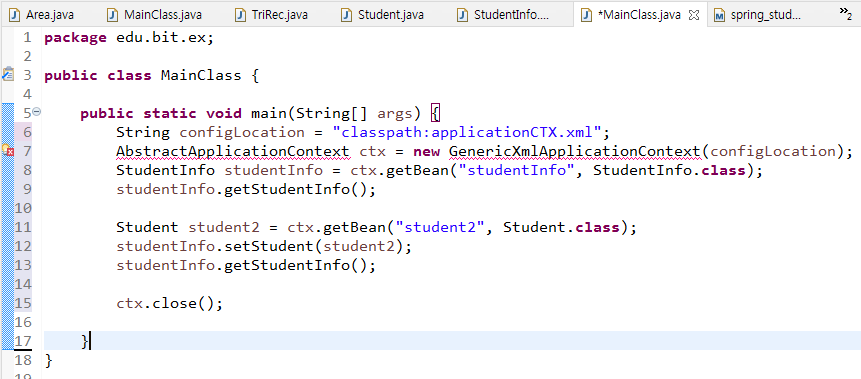
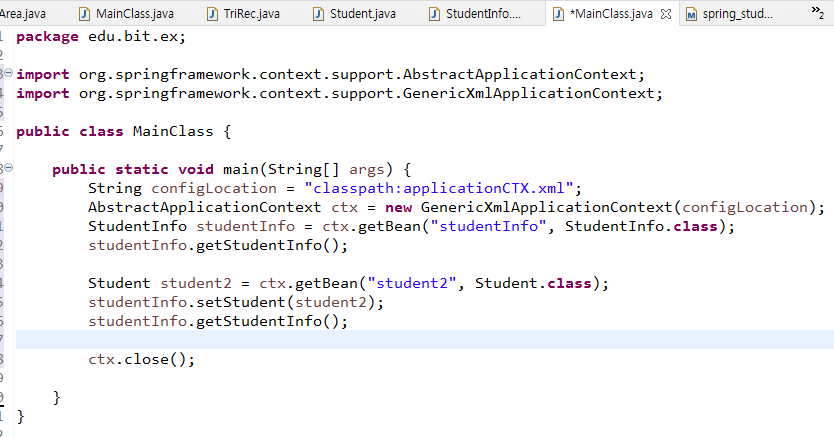
[MainClass.java]
package edu.bit.ex;

import org.springframework.context.support.AbstractApplicationContext;
import org.springframework.context.support.GenericXmlApplicationContext;

public class MainClass {

	public static void main(String[] args) {
		String configLocation = "classpath:applicationCTX.xml";
		AbstractApplicationContext ctx = new GenericXmlApplicationContext(configLocation);
											//GenericXml ApplicationContext 이렇게 나뉘어지는 느낌
		StudentInfo studentInfo = ctx.getBean("studentInfo", StudentInfo.class);
		studentInfo.getStudentInfo();

		Student student2 = ctx.getBean("student2", Student.class);
		studentInfo.setStudent(student2);
		studentInfo.getStudentInfo();

		ctx.close();
	}
}
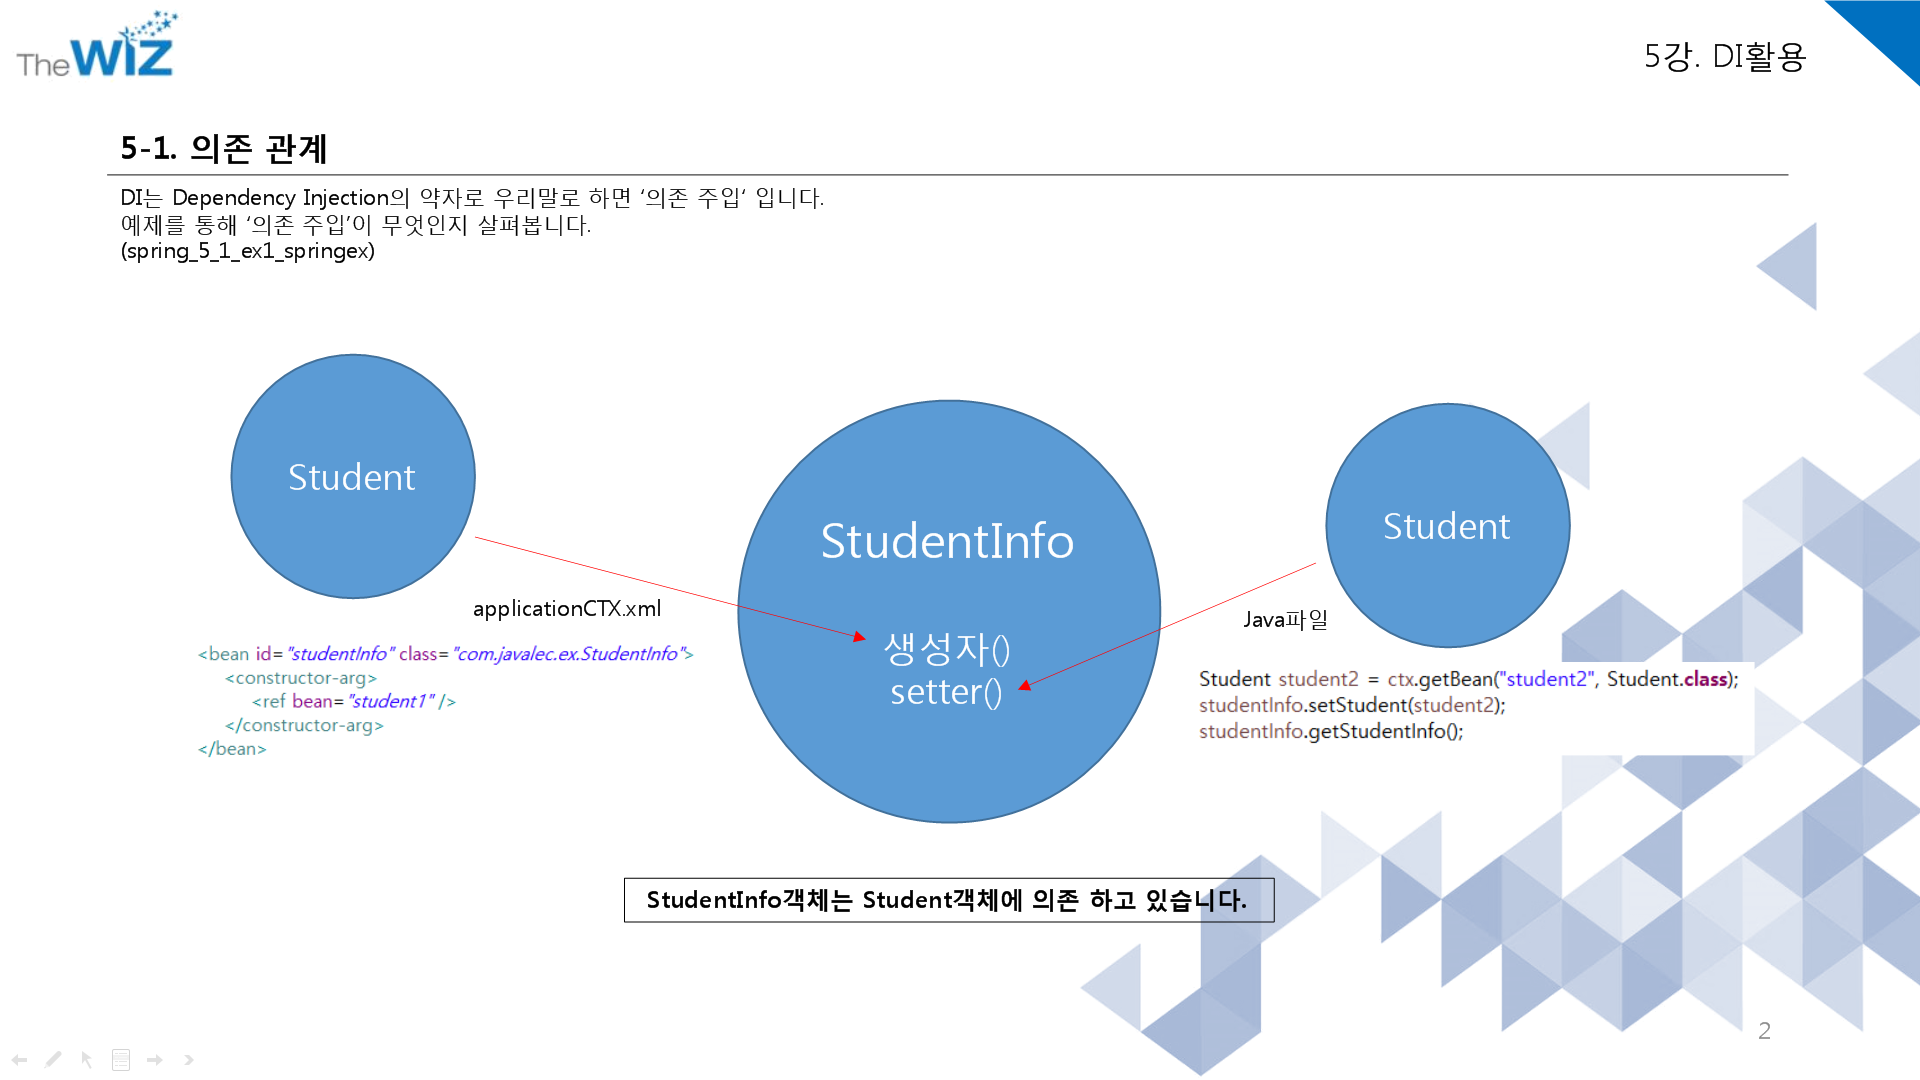
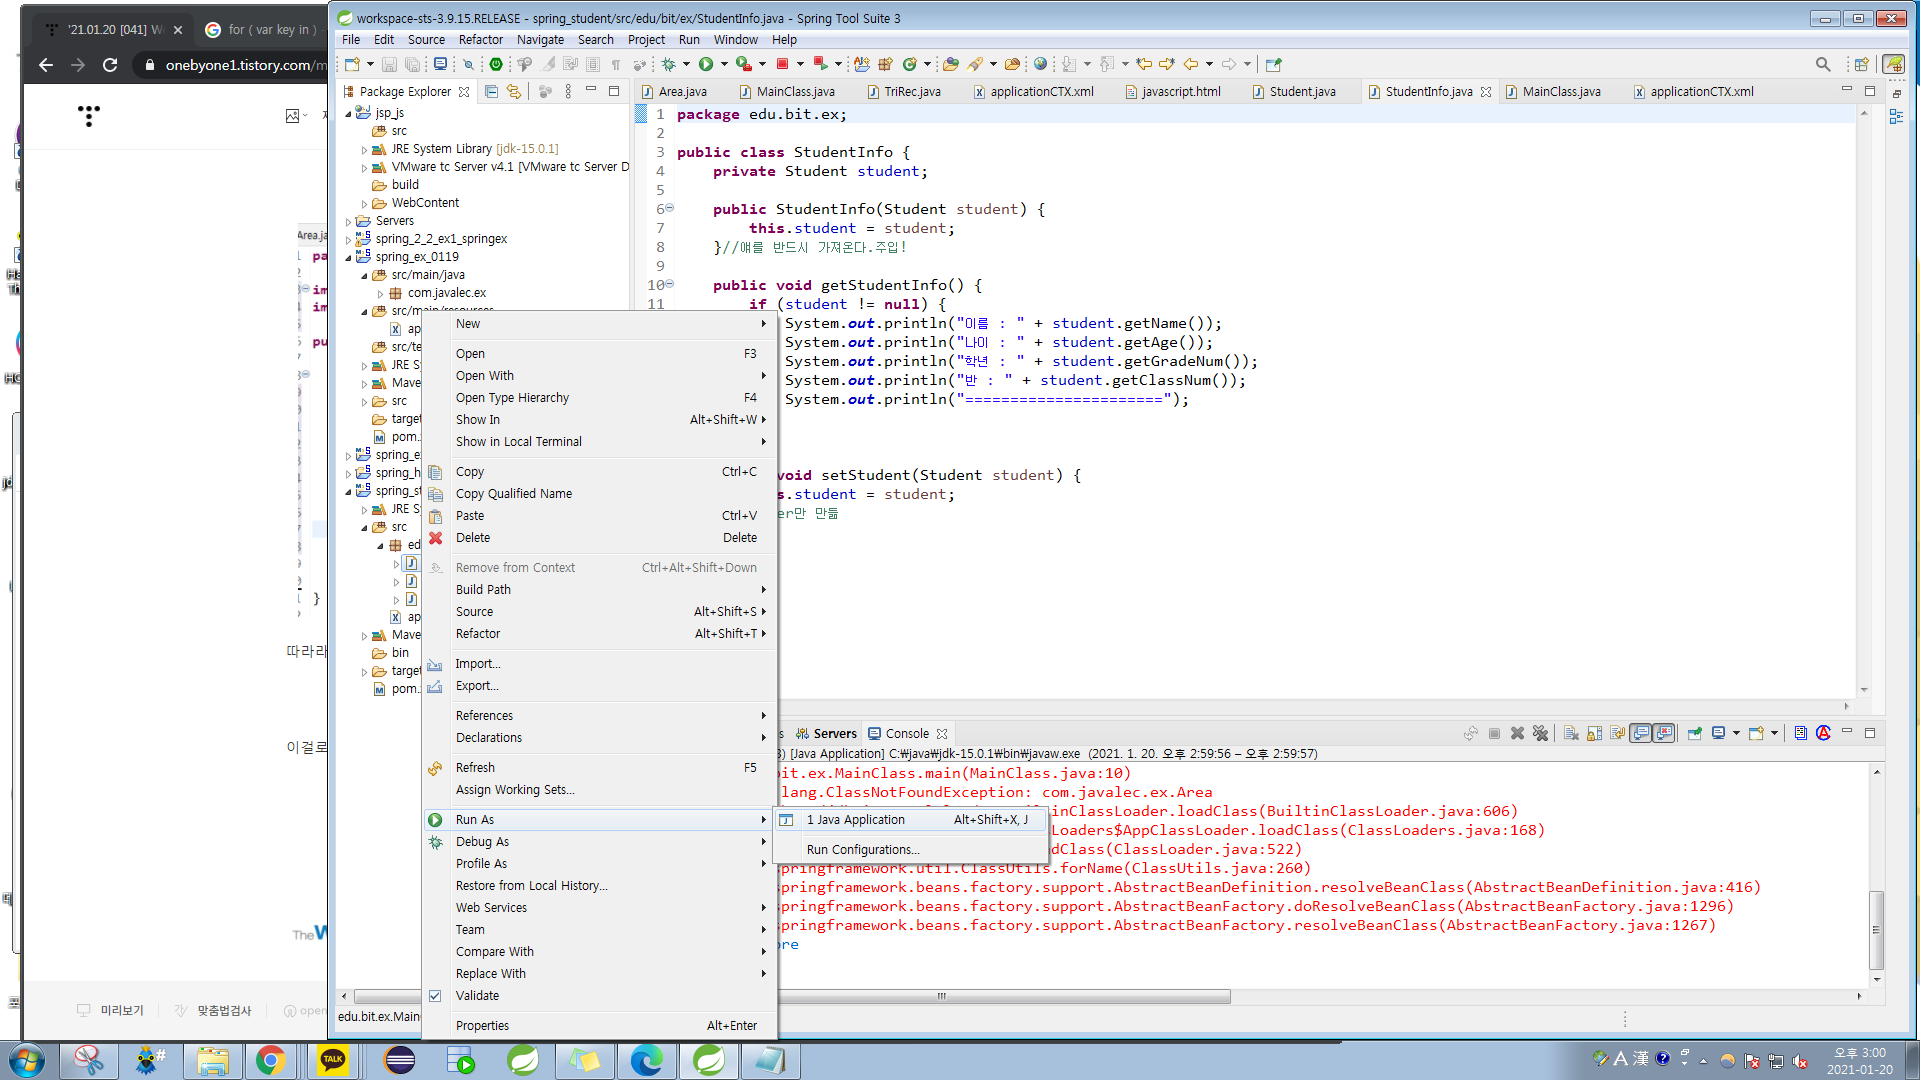
[StudentInfo.java]
package edu.bit.ex;
public class StudentInfo {
private Student student;
public StudentInfo(Student student) {
this.student = student;
}//얘를 반드시 가져온다.주입!
public void getStudentInfo() {
if (student != null) {
System.out.println("이름 : " + student.getName());
System.out.println("나이 : " + student.getAge());
System.out.println("학년 : " + student.getGradeNum());
System.out.println("반 : " + student.getClassNum());
System.out.println("======================");
}
}
public void setStudent(Student student) {
this.student = student;
}//setter만 만듦
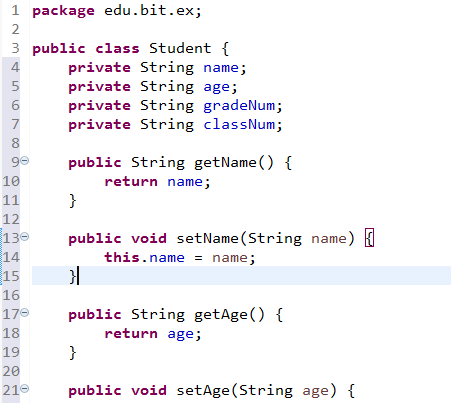
}package edu.bit.ex;
public class Student {
private String name;
private String age;
private String gradeNum;
private String classNum;
//↓이거 안쓰면 오류남
public Student(String name, String age, String gradeNum, String classNum) {
this.name = name;
this.age = age;
this.gradeNum = gradeNum;
this.classNum = classNum;
}
public String getName() {
return name;
}
public void setName(String name) {
this.name = name;
}
public String getAge() {
return age;
}
public void setAge(String age) {
this.age = age;
}
public String getGradeNum() {
return gradeNum;
}
public void setGradeNum(String gradeNum) {
this.gradeNum = gradeNum;
}
public String getClassNum() {
return classNum;
}
public void setClassNum(String classNum) {
this.classNum = classNum;
}
}
<?xml version="1.0" encoding="UTF-8"?>
<beans xmlns="http://www.springframework.org/schema/beans"
	xmlns:xsi="http://www.w3.org/2001/XMLSchema-instance"
	xsi:schemaLocation="http://www.springframework.org/schema/beans http://www.springframework.org/schema/beans/spring-beans.xsd">

	<!-- Student(blabla~~) 생성자 호출하는 방법 -->
	<bean id="student1" class="edu.bit.ex.Student">
		<constructor-arg>
			<value>홍길동</value>
		</constructor-arg>
		<constructor-arg>
			<value>10살</value>
		</constructor-arg>
		<constructor-arg>
			<value>3학년</value>
		</constructor-arg>
		<constructor-arg>
			<value>20번</value>
		</constructor-arg>
	</bean>

	<bean id="student2" class="edu.bit.ex.Student">
		<constructor-arg value="홍길동" />
		<constructor-arg value="9살" />
		<constructor-arg value="2학년" />
		<constructor-arg value="10번" />
	</bean>

	<bean id="studentInfo" class="edu.bit.ex.StudentInfo">
		<constructor-arg>
			<ref bean="student1" />
			<!-- ↑레퍼런스 student1을 갖다 넣는다. -->
		</constructor-arg>
	</bean>
</beans>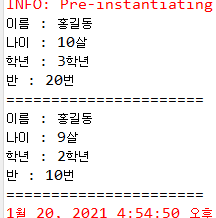
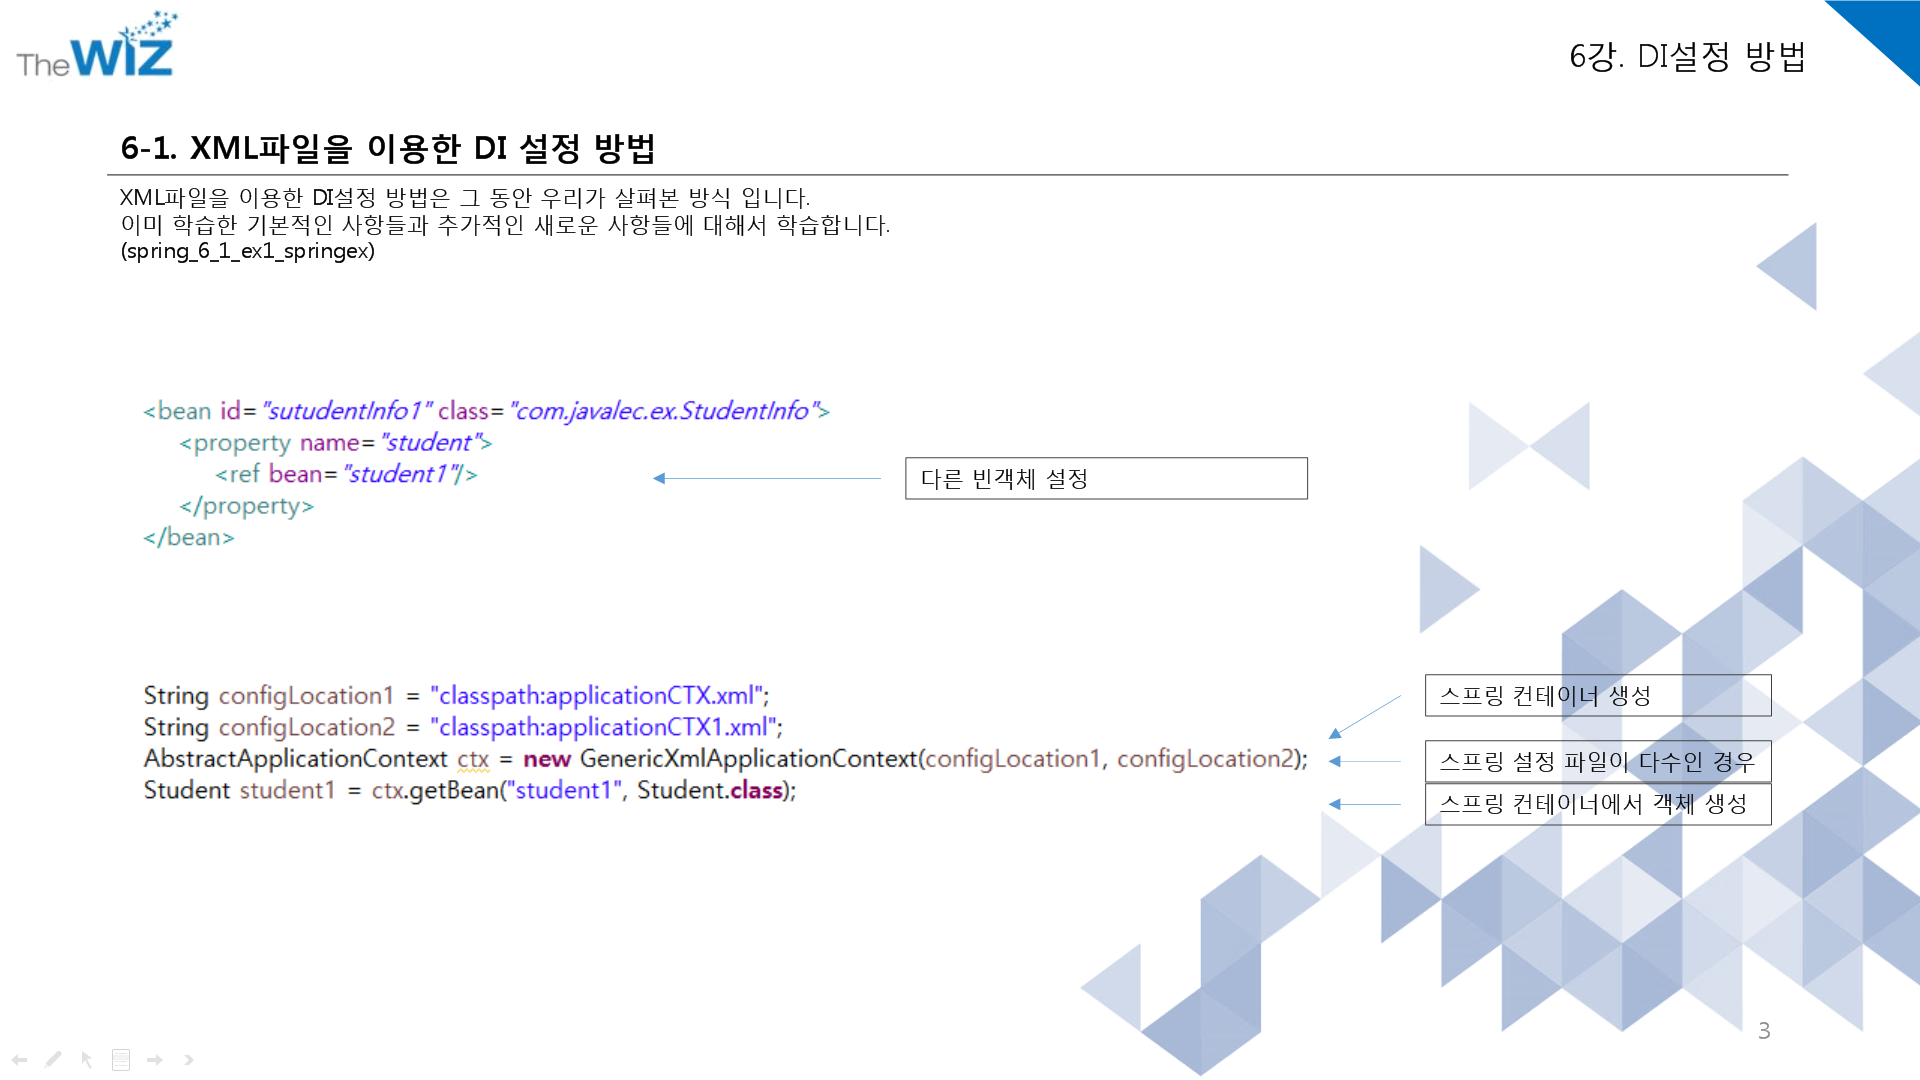
어제 코드랑 다른 점
Setter Injection:<property>태그
Setter메소드를 통해 의존 관계가 있는 Bean을 주입할려면 <property>태그를 사용할 수 있다.
- ref 속성을 사용하면 Bean이름을 이용해 주입할 Bean을 찾는다.
- value 속성은 단순 값 또는 Bean이 아닌 객체를 주입할 때 사용한다.
Constructor Injection : <constructor-arg>태그
Constructor를 통해 의존 관계가 있는 Bean을 주입하려면 <constructor-arg>태그를 사용할 수 있다.
Constructor 주입 방식은 생성자의 파라미터를 이용하기 때문에 한번에 여러 개의 객체를 주입할 수 있다.
- index 속성을 사용하는 방법과 name속성을 이용하는 방법으로 나뉜다.
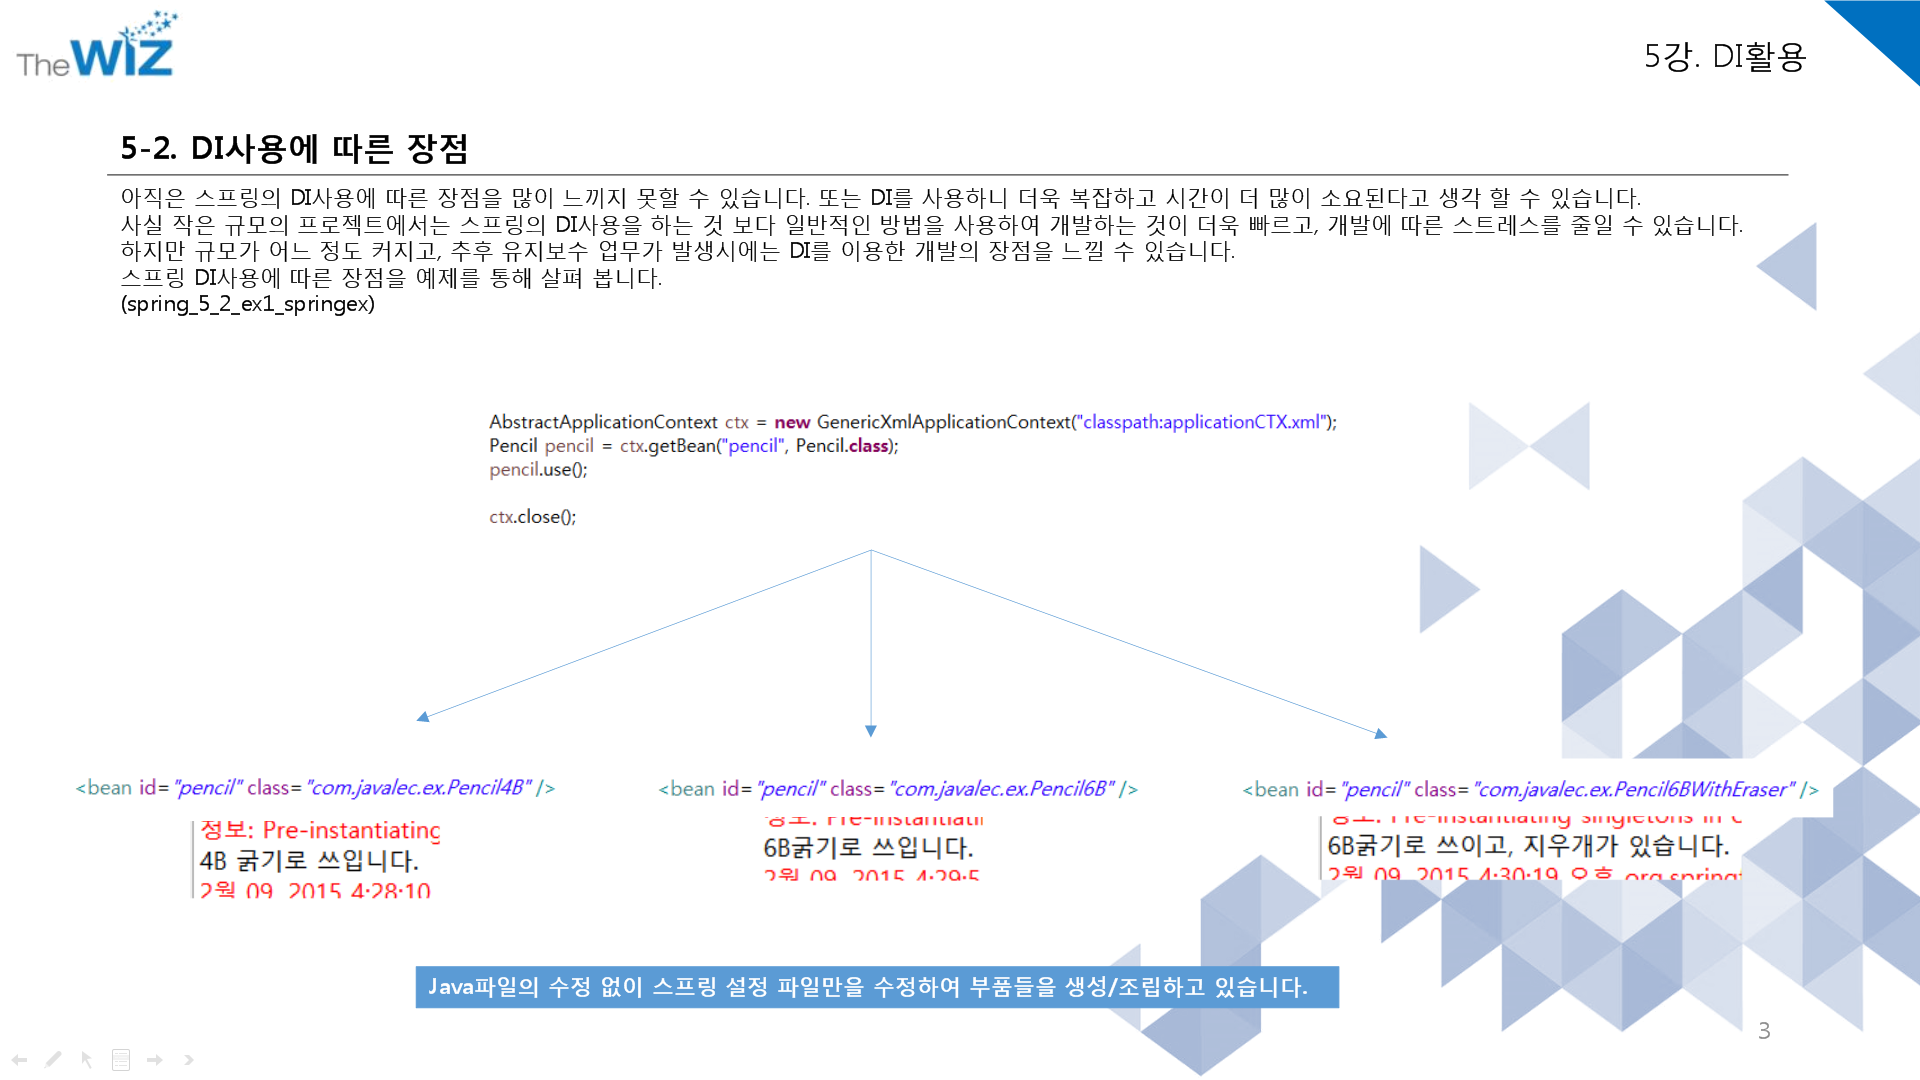
<이해하기 더욱 쉬운 예제>
pencil4B 6B 6BWithEraser
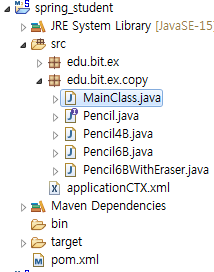
[MainClass.java]
package edu.bit.ex.copy;

import org.springframework.context.support.AbstractApplicationContext;
import org.springframework.context.support.GenericXmlApplicationContext;

public class MainClass {

	public static void main(String[] args) {
		String configLocation = "classpath:applicationCTX.xml";
		AbstractApplicationContext ctx = new GenericXmlApplicationContext(configLocation);
											//GenericXml ApplicationContext 이렇게 나뉘어지는 느낌

		Pencil pencil = ctx.getBean("pencil",Pencil.class);
		pencil.use();

		ctx.close();
	}
}
[Pencil.java] interface
package edu.bit.ex.copy;

public interface Pencil {
	void use();
}
[Pencil4B.java]
package edu.bit.ex.copy;

public class Pencil4B implements Pencil {
	// 자손이 구현

	@Override
	public void use() {
		System.out.println("4B 굵기로 쓰입니다.");
	}
}
[Pencil6B.java]
package edu.bit.ex.copy;
public class Pencil6B implements Pencil {
// 자손이 구현
@Override
public void use() {
System.out.println("6B 굵기로 쓰입니다.");
}
}
[Pencil6BWithEraser.java]
package edu.bit.ex.copy;

public class Pencil6BWithEraser implements Pencil {
	// 자손이 구현

	@Override
	public void use() {
		System.out.println("6B에, 지우개가 있습니다.");
	}
}
[applicationCTX.xml]
<?xml version="1.0" encoding="UTF-8"?>
<beans xmlns="http://www.springframework.org/schema/beans"
	xmlns:xsi="http://www.w3.org/2001/XMLSchema-instance"
	xsi:schemaLocation="http://www.springframework.org/schema/beans http://www.springframework.org/schema/beans/spring-beans.xsd">

	<bean id="pencil" class="edu.bit.ex.Pencil4B"></bean>
    		//"edu.bit.ex.Pencil4B" 이부분만 수정하면 소스코드를 바꾸지 않고
            //.xml에서만 수정해도 원하는 구현이 가능하다.

</beans>
DI사용 장점. 개발하는것이 더욱 빨라짐.
결국 다형성(폴리몰피즘)적용
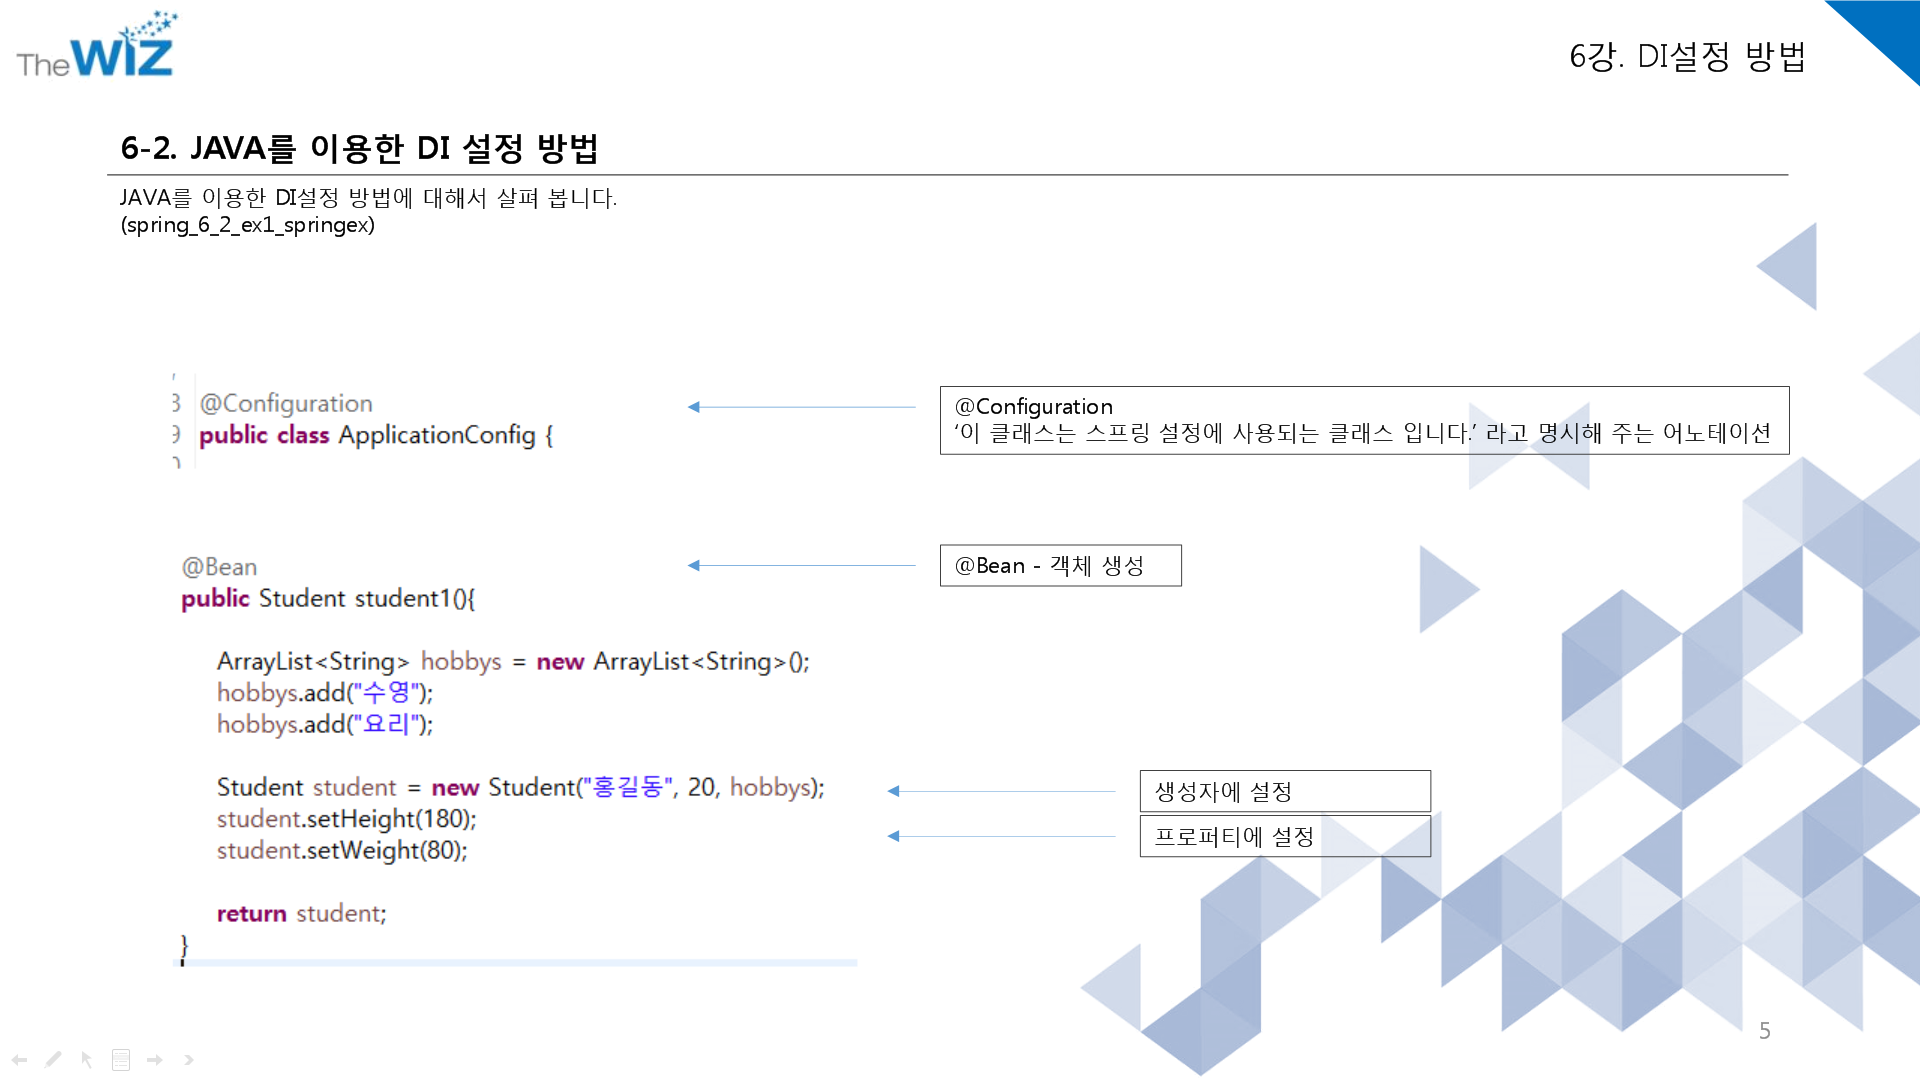
어노테이션 사용해서 만드는 코드

[MainClass.java]
package edu.bit.ex;

import org.springframework.context.annotation.AnnotationConfigApplicationContext;

public class MainClass {

	public static void main(String[] args) {
		AnnotationConfigApplicationContext ctx = new AnnotationConfigApplicationContext(ApplicationConfig.class);

		Student student1 = ctx.getBean("student1", Student.class);
		System.out.println("이름 : " + student1.getName());
		System.out.println("나이 : " + student1.getAge());
		System.out.println("취미 : " + student1.getHobbys());
		System.out.println("신장 : " + student1.getHeight());
		System.out.println("몸무게 : " + student1.getWeight());

		Student student2 = ctx.getBean("student2", Student.class);
		System.out.println("이름 : " + student2.getName());
		System.out.println("나이 : " + student2.getAge());
		System.out.println("취미 : " + student2.getHobbys());
		System.out.println("신장 : " + student2.getHeight());
		System.out.println("몸무게 : " + student2.getWeight());

		ctx.close();
	}

}
[Student.java]
package edu.bit.ex;

import java.util.ArrayList;

public class Student {

	private String name;
	private int age;
	private ArrayList<String> hobbys;
	private double height;
	private double weight;

	public Student(String name, int age, ArrayList<String> hobbys) {
		this.name = name;
		this.age = age;
		this.hobbys = hobbys;
	}

	public void setName(String name) {
		this.name = name;
	}

	public void setAge(int age) {
		this.age = age;
	}

	public void setHobbys(ArrayList<String> hobbys) {
		this.hobbys = hobbys;
	}

	public void setHeight(double height) {
		this.height = height;
	}

	public void setWeight(double weight) {
		this.weight = weight;
	}

	public String getName() {
		return name;
	}

	public int getAge() {
		return age;
	}

	public ArrayList<String> getHobbys() {
		return hobbys;
	}

	public double getHeight() {
		return height;
	}

	public double getWeight() {
		return weight;
	}

}
[ApplicationConfig.java]
package edu.bit.ex;
import java.util.ArrayList;
import org.springframework.context.annotation.Bean;
import org.springframework.context.annotation.Configuration;
import org.springframework.context.annotation.ImportResource;
@Configuration
public class ApplicationConfig {
//이건 내가 알아서 정하는 파일 이름. 뒤에 Config라고 붙여주는게 좋다.
@Bean
public Student student1() {
ArrayList<String> hobbys = new ArrayList<String>();
hobbys.add("수영");
hobbys.add("요리");
Student student = new Student("홍길동", 20, hobbys);
student.setHeight(180);
student.setWeight(80);
return student;
}
@Bean
public Student student2() {
ArrayList<String> hobbys = new ArrayList<String>();
hobbys.add("독서");
hobbys.add("음악감상");
Student student = new Student("홍길순", 18, hobbys);
student.setHeight(170);
student.setWeight(55);
return student;
}
}
↑xml파일은 필요없는것인가...
요즘엔 XML방식말고 DI 방식으로 씀. 이걸 선호하는이유 = 디버깅이 가능하다.
@Configuration 어노테이션
어제는
AbstractApplicationContext ctx = new GenericXmlApplicationContext(configLocation);
제네릭이었지만
오늘은
AnnotationConfigApplicationContext ctx = new AnnotationConfigApplicationContext(ApplicationConfig.class);
===========
뉴렉 17강
xml에 있는 Configuration을 클래스로 옮김. 순수 어노테이션으로만 구현할거임
xml파일이 자바파일로 바뀌었다고 생각하면됨
자바파일은 xml과다르게 내가 직접 만드는것(xml은 spring이 도와줌)
bean - ioc컨테이너에 담는것임.
@Bean
public Student student1() { 에서 student1이 xml id="student1" 이랑 똑같다.
함수명을 가지고있다고해서 함수명이 아니라 명사! id!임 getStudent 이런식XXX
6강을 나갔었나............?
Java_자바_Spring_스프링_강의_06강_DI설정 방법


DI설정 = 의존성 주입설정 (객체생성한다는 것과 똑같은 말)


오늘의 문제
1. 아래를 설명하시오.
-DI : Dependency Injecton (=종속성 주입)
부품 객체를 생성하고 조립한다.
<주입방법 2가지>
- Setter Injection : setter 함수로 주입
ex. B b = new B();
A a = new A();
a.setB(b); //이게 spring. spring은 이렇게 부품을 조립해준다.
- Construction Injection : 생성자를 통해 주입
ex. B b = new B();
A a= new A(b); //A(b)가 spring
-IoC : Inversion of Control
-IoC 컨테이너
역순으로 조립한 컨테이너(작은 부품에서 큰부품으로 조립해서 과정을 알 수 있다.)
DI(부품)이 결합해 역순으로 조립한 컨테이너
//IOC 생성순서
Computer computer = new Computer(); 같은 완제품이 아닌
Chip chip = new Chip();
CPU cpu = new Cpu(chip);
Computer computer = new Computer(Cpu); // = 조립컴
2. JS로 시간이 초단위로 갱신되는 페이지를 만드시오.
<!DOCTYPE html>
<html>
<head>
<meta charset="EUC-KR">
<title>Insert title here</title>
</head>
<body>
	<script type="text/javascript">
	setTimeout("location.reload()", 1000);
	</script>
</body>
</html>
//1초후마다 계속 갱신된다.
3. js 에서의 객체생성 방법은?
var 변수명 = {
key : value,
key : value,
...
}
ex.
var objCar = {
		width : "3m",
		height : "2m",
		cc : "2000cc",
		energy : 100
        }
4. 아래를 자바 스크립트로 작성하시오.
-변수 radius
-get set 함수 작성
-프롬프트로 숫자 입력값 받음
-set 함수를 radius 값 세팅
-객체 생성후 getArea() 함수 호출하면 원넓이 출력
<!DOCTYPE html>
<html>
<head>
<meta charset="EUC-KR">
<title>Insert title here</title>
<script type="text/javascript"></script>
<style>
</style>
</head>
<body>
	<script type="text/javascript">
		function Circle() {
			var radius = 0;

			this.area = function() {
				return (this.radius * this.radius * Math.PI);

			}
			this.getRadius = function() {
				return this.redius;
			}
			this.setRadius = function(radius) {
				if (!isNaN(radius)) {
					this.radius = radius;
				} else {
					console.log("radius is NaN(Not a Number)!");
				}
			}
		}

		var getArea = new Circle();
		this.radius = prompt("원의 넓이 구하기", "원의 반지름을 입력하세요.")
		getArea.setRadius(this.radius);
		console.log("원의 넓이는 : " + getArea.area());
	</script>
</body>
</html>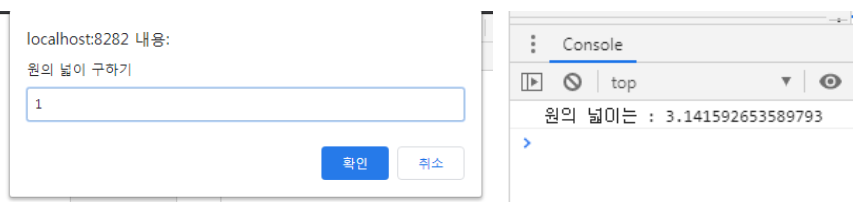
5.위와 같은 방식으로 가위바위보 게임을 짜시오.
-DOM 객체를 배우면 이미지도 바꿔 보도록 합시다.
<!DOCTYPE html>
<html>
<head>
<meta charset="EUC-KR">
<title>Insert title here</title>
<script type="text/javascript"></script>
<style>
</style>
</head>
<body>
	<script type="text/javascript">
		function Game() {
			var com;
			var user;
			var result;
			this.getCom = function() {
				return this.com = Math.floor((Math.random()*3)+1);

			}
			this.setCom = function(com) {
				this.com = com;
			}

			this.getUser = function() {
				return this.user;
			}
			this.setUser = function(user) {
				this.user = user;
				if (user == 1 || user == 2 || user == 3) {
					this.user = user;
				} else {
					console.log("가위=1, 바위=2, 보=3 중에 입력하세요")
				}
			}

			this.result = function() {

				if (this.com == 1 && this.user == 1) {
					return ("비김");
				} else if (this.com == 1 && this.user == 2) {
					return("이김");
				} else if (this.com == 1 && this.user == 3) {
					return("컴퓨터승리");
				}

				if (this.com == 2 && this.user == 2) {
					return("비김");
				} else if (this.com == 2 && this.user == 1) {
					return("컴퓨터승리");
				} else if (this.com == 2 && this.user == 3) {
					return("이김");
				}

				if (this.com == 3 && this.user == 3) {
					return("비김");
				} else if (this.com == 3 && this.user == 1) {
					return("이김");
				} else {
					return("컴퓨터승리");
				}
			}
		}
		var userinput = prompt("가위=1, 바위=2, 보=3", "입력");
		var gameResult = new Game();
		gameResult.getCom();
		gameResult.setUser(userinput);
		console.log("컴퓨터 : "+gameResult.getCom());
		console.log("나 : "+userinput);
		console.log("결과는 : " + gameResult.result());
	</script>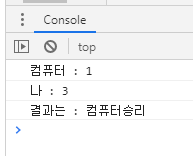
//출력값이 숫자말고 문자로 구현할것.
//가위1 바위2 보3 일때. 가위바위보 값 로직=(user-com+1)%3
6.annotation 방식으로 하여 객체 생성후 사각형과 삼각형 넓이를 구하시오.
package com.javalec.ex;
import org.springframework.context.annotation.AnnotationConfigApplicationContext;
public class MainClass {
public static void main(String[] args) {
AnnotationConfigApplicationContext ctx = new AnnotationConfigApplicationContext(ApplicationConfig.class);
Triangle tri = ctx.getBean("triangle", Triangle.class);
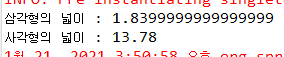
System.out.println("삼각형의 넓이 : " + tri.getArea());
Rectangle rec = ctx.getBean("rectangle", Rectangle.class);
System.out.println("사각형의 넓이 : " + rec.getArea());
ctx.close();
}
}
package com.javalec.ex;

public class Triangle {
	private double width;
	private double height;

	public double getWidth() {
		return width;
	}
	public void setWidth(double width) {
		this.width = width;
	}
	public double getHeight() {
		return height;
	}
	public void setHeight(double height) {
		this.height = height;
	}
	public double getArea() {
		return width * height / 2;
	}
}
package com.javalec.ex;

public class Rectangle {
	private double width;
	private double height;

	public double getWidth() {
		return width;
	}
	public void setWidth(double width) {
		this.width = width;
	}
	public double getHeight() {
		return height;
	}
	public void setHeight(double height) {
		this.height = height;
	}
	public double getArea() {
		return width * height;
	}
}
package com.javalec.ex;
import org.springframework.context.annotation.Bean;
import org.springframework.context.annotation.Configuration;
@Configuration
public class ApplicationConfig {
@Bean
public Rectangle rectangle() {
Rectangle rec = new Rectangle();
rec.setHeight(5.3);
rec.setWidth(2.6);
return rec;
}
@Bean
public Triangle triangle() {
Triangle tri = new Triangle();
tri.setHeight(2.3);
tri.setWidth(1.6);
return tri;
}
}
7.금일 배운 Pencil의 예처럼 아래를 인터 페이스를 구현하여, 원, 삼각형, 사각형의 넓이를 설정파일 에서 바꾸면 각각의 넓이가 구하여 지도록 하시오.
interface IShape{
double getArea();
}
[applicationCTX.xml]
<?xml version="1.0" encoding="UTF-8"?>
<beans xmlns="http://www.springframework.org/schema/beans"
	xmlns:xsi="http://www.w3.org/2001/XMLSchema-instance"
	xsi:schemaLocation="http://www.springframework.org/schema/beans http://www.springframework.org/schema/beans/spring-beans.xsd">

	<!-- 클래스명만 수정하면 각각의 넓이가 구해짐-->
	<!--<bean id="ishape" class="com.javalec.ex.Circle"> -->
	<!-- <bean id="ishape" class="com.javalec.ex.Rectangle"> -->
	<bean id="ishape" class="com.javalec.ex.Triangle">
		<property name="side">
			<value>2</value>
		</property>
	</bean>
</beans>
[MainClass.java]
package com.javalec.ex;
import org.springframework.context.support.AbstractApplicationContext;
import org.springframework.context.support.GenericXmlApplicationContext;
public class MainClass {
public static void main(String[] args) {
String configLocation = "classpath:applicationCTX.xml";
AbstractApplicationContext ctx = new GenericXmlApplicationContext(configLocation);
IShape ishape = ctx.getBean("ishape",IShape.class);
//★shape.setWidth(10);이 안되는 이유.
System.out.println(ishape.getArea());
//void가 아니기 때문에 클래스 return값을 호출해야함
ctx.close();
}
}[IShape.java]
package com.javalec.ex;
public interface IShape {
double getArea();
}[Triangle.java]
package com.javalec.ex;
public class Triangle implements IShape {
double side;
public double getSide() {
return side;
}
public void setSide(double side) {
this.side = side;
}
@Override
public double getArea() {
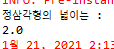
System.out.println("정삼각형의 넓이는 : ");
return side*side*0.5;
}
}[Circle.java]
package com.javalec.ex;
public class Circle implements IShape {
double side;
public double getSide() {
return side;
}
public void setSide(double side) {
this.side = side;
}
@Override
public double getArea() {
System.out.println("원의 넓이는 : ");
return side*side* Math.PI;
}
}[Rectangle.java]
package com.javalec.ex;
public class Rectangle implements IShape {
double side;
public Rectangle(){
//디폴트 생성자 꼬오오옥 만들어주기
}
public Rectangle(double side) {
this.side = side;
}
public double getSide() {
return side;
}
public void setSide(double side) {
this.side = side;
}
@Override
public double getArea() {
System.out.println("정사각형의 넓이는 : ");
return side*side;
}
}
8.스프링 미리 공부 구현 해야될 내용-미리준비해 놓읍시다.(한마디로 외워 제낍시다).
스프링 게시판(오라클 + 마이바티스),스프링 시큐리티, 소셜로그인(OAuth2)-카카오,네이버 먼저, 결재구현(아임포트)
소셜로그인 - 카카오계정
[BoardController.java]
package edu.bit.board.controller;

import org.springframework.stereotype.Controller;
import org.springframework.ui.Model;
import java.text.DateFormat;
import java.util.Date;
import java.util.Locale;
import org.slf4j.Logger;
import org.slf4j.LoggerFactory;
import org.springframework.web.bind.annotation.GetMapping;

@Controller
public class KakaoController {

	private static final Logger logger = LoggerFactory.getLogger(KakaoController.class);

	/**
	 * Simply selects the home view to render by returning its name.
	 */
	@GetMapping("/home")
	public void home(Locale locale, Model model) {
		logger.info("Welcome home! The client locale is {}.", locale);

		Date date = new Date();
		DateFormat dateFormat = DateFormat.getDateTimeInstance(DateFormat.LONG, DateFormat.LONG, locale);

		String formattedDate = dateFormat.format(date);

		model.addAttribute("serverTime", formattedDate);

	}

}
[home.jsp]
<%@ page language="java" contentType="text/html; charset=UTF-8"
    pageEncoding="UTF-8"%>
<%@ taglib prefix="c" uri="http://java.sun.com/jsp/jstl/core" %>
<!DOCTYPE html PUBLIC "-//W3C//DTD HTML 4.01 Transitional//EN" "http://www.w3.org/TR/html4/loose.dtd">
<html>
<head>
    <meta charset="utf-8" />
    <meta http-equiv="X-UA-Compatible" content="IE=edge" />
    <meta name="viewport" content="user-scalable=no, initial-scale=1.0, maximum-scale=1.0, minimum-scale=1.0, width=device-width" />
    <title>Login Demo - Kakao JavaScript SDK</title>
    <script src="http://developers.kakao.com/sdk/js/kakao.min.js"></script>

</head>
<body>
    <a id="kakao-login-btn"></a><br>
    <a href="http://developers.kakao.com/logout">Logout</a>
    <script type='text/javascript'>

        // JavaScript 키 설정
        Kakao.init('36d5bbfd1b0bc7d5ce37f1dfa97fb95c');
        // 카카오 로그인 버튼을 생성
        Kakao.Auth.createLoginButton({
            container: '#kakao-login-btn',
            success: function (authObj) {
                alert("로그인 성공");
            },
            fail: function (err) {
                alert("로그인 실패");
            }
        });

    </script>
</body>
</html>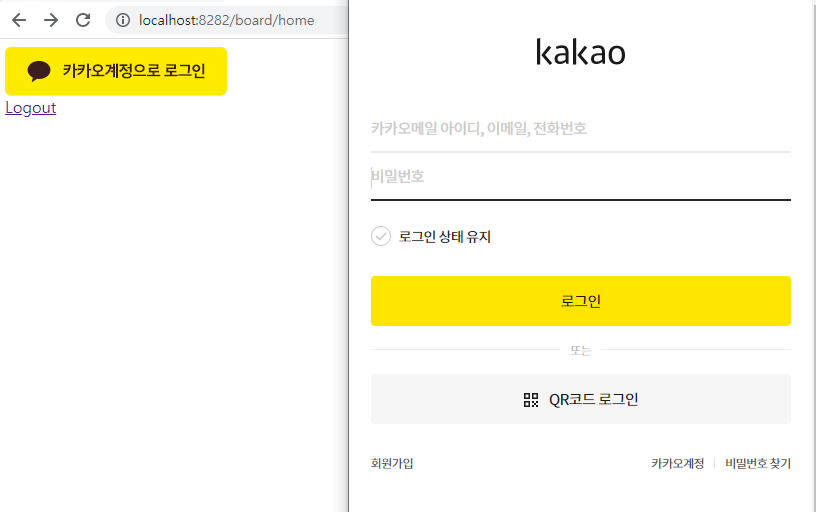

'코딩 > 수업 정리' 카테고리의 다른 글
| 21.01.22 [043] Fri (0) | 2021.01.22 |
|---|---|
| 21.01.21 [042] Thu (0) | 2021.01.21 |
| 21.01.19 [040] Tue (0) | 2021.01.19 |
| 21.01.18 [039] Mon (0) | 2021.01.18 |
| 21.01.15 [038] Fri (0) | 2021.01.15 |


댓글